

This Renogy 200W flexible solar panel solves a specific problem rigid panels can’t: mounting on a curved surface, like an RV roof with an air conditioner bump or a boat cabin. It bends to match the surface it’s mounted on and weighs a fraction of what a framed panel does, which matters if you’re working with a weight-sensitive roof.
The tradeoff is durability — flexible panels generally don’t last as long as rigid framed ones and need to be mounted flat against a surface rather than angled for optimal sun exposure. They’re the right call when a rigid panel simply won’t fit or the weight savings matter more than squeezing out maximum lifespan.
Flexible panels wear differently than rigid ones — see our guide on solar panel degradation over 25 years for what to expect long-term.
Because it bends to a certain curvature, this Renogy 200W flexible solar panel works on curved RV roofs, boat decks, and other surfaces where a rigid panel simply won’t sit flat. It’s also lighter than a comparable rigid panel, which matters for vehicle-mounted installs where every pound counts. The tradeoff is a shorter expected lifespan than rigid panels.
It earns its place specifically on curved or vehicle-mounted surfaces where rigid panels aren’t an option. Overall, this Renogy 200W flexible solar panel is the right call specifically when a rigid panel won’t physically fit your mounting surface.
Mounting is done with adhesive or grommets rather than rigid brackets, so plan on a clean, dry surface for the adhesive to bond properly. Keep in mind flexible panels run warmer than rigid ones since there's no air gap behind them, which can slightly reduce output on hot days.

This Renogy 400W solar panel kit bundles solar panels totaling 400 watts with a charge controller, mounting hardware, and the cables to connect it all — essentially everything you need to get a mid-size solar array up and running without sourcing every component separately. At 400 watts, it's enough to meaningfully charge a real battery bank, not just trickle-charge a single battery.
Buying it as a kit usually works out cheaper than piecing the same components together individually, and it removes a lot of the guesswork around compatibility for anyone building their first real system rather than just dipping a toe in with a single panel.
If you're deciding where to put these panels, our comparison of roof vs. portable panel mounting can help you choose.
This Renogy 400W solar panel kit bundles four 100-watt panels with the mounting hardware, wiring, and a charge controller needed to get a mid-size system running, which saves you from sourcing each component separately. At 400 watts, it's enough to keep a moderate battery bank topped off on a sunny day, making it a practical choice for a shed, small cabin, or supplemental RV setup.
It's a convenient starting point for a mid-size off-grid system without sourcing every component separately. Overall, it's a convenient way to get a mid-size system running without hunting down each part separately, and the included charge controller means one less thing to source on your own.
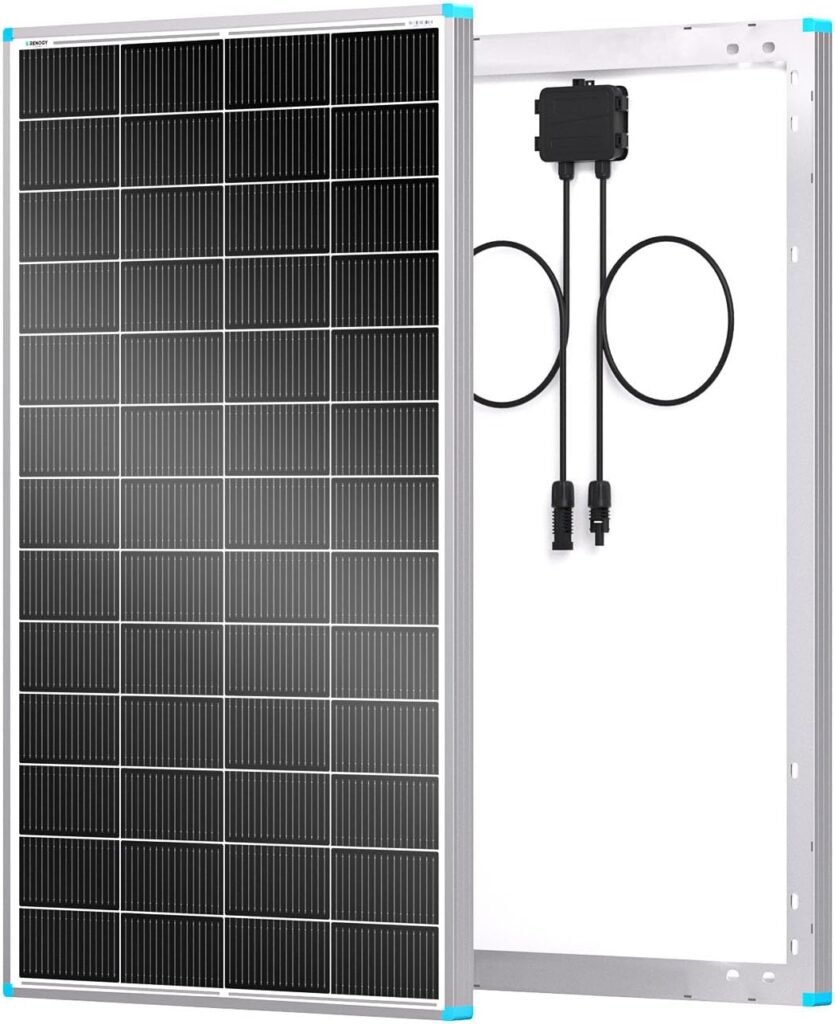
Once you've outgrown a single small panel, Renogy's 200 watt solar panel is a natural next step. It's built with N-type monocrystalline cells rated at 25% efficiency, which means you're getting more power per square foot of roof or ground space than you would from older panel designs — useful when you're trying to fit meaningful wattage into a limited mounting area.
The 24 volt output is worth noting before you buy. Instead of wiring several panels into a 12 volt array, a 24 volt panel like this one lets you push the same power at lower current, which means thinner wire runs and less voltage drop over distance. That makes it a good match for cabins, larger vans, or any setup where your panels are mounted a fair distance from your charge controller.
In practical terms, 200 watts is enough to meaningfully recharge a mid-size battery bank on a sunny day, run a compressor fridge, keep lights and electronics going, and still leave some margin. It's not going to run central air, but for a cabin or a well-equipped RV, this panel can realistically be your entire array, not just an add-on.
Before you buy a 200 watt solar panel, it's worth doing the math on your actual daily power use so you're not over- or under-buying. Our guide on Solar Panel Sizing walks through exactly how to figure out what wattage you really need.

If you're just getting into solar and want to start small, Renogy's 100 watt solar panel is one of the easiest ways to dip a toe in without overspending. It's an N-type monocrystalline panel, which just means it squeezes more usable power out of the same square footage than older panel technology — helpful when you're working with limited roof space on an RV, van, or shed.
The included Z brackets are the real convenience here. Instead of sourcing mounting hardware separately and hoping it fits, you get brackets designed specifically for flush-mounting to a flat or slightly curved roof. That makes this panel a solid pick for a first RV solar install or a small off-grid shed where you just need to get a panel bolted down and wired in without overthinking the mounting hardware.
At 100 watts, don't expect this single panel to run a whole household — it's realistically enough to trickle-charge a single battery, keep a small fridge or fan running, or top off phones and laptops on a sunny day. Where it shines is as a starter panel or as an add-on to an existing array when you need a bit more wattage without redesigning your whole mounting setup.
One thing worth checking before you buy: brackets like these work best on a flat or gently curved surface. If you're planning tilt mounts for a better winter angle, take a look at our breakdown on RV Solar Tilt Brackets before you commit to a flush-mount setup. Bottom line: this 100 watt solar panel won't power a house, but as a first panel or a small add-on, it's hard to beat for the price and the mounting hassle it saves you.

This Renogy 3000W inverter is sized for systems that need to run serious loads — power tools, larger appliances, or multiple devices simultaneously — rather than just keeping a laptop and a few lights running. Pure sine wave output means it’s producing clean power safe for sensitive electronics, unlike cheaper modified sine wave inverters that can cause issues with certain devices.
At this size, you’re also getting into territory where wiring, fusing, and battery capacity all need to be sized to match — a 3000W inverter pulling from an undersized battery bank or wire gauge won’t perform the way the spec sheet suggests. Make sure the rest of your system is sized to actually support the load before you commit to an inverter this size.
Before buying, confirm you actually need this much capacity with our guide on inverter sizing.
At 3000 watts continuous, this Renogy 3000W inverter has enough headroom to run power tools, kitchen appliances, and other equipment with significant startup surge, which is where smaller inverters often fall short. Its pure sine wave output is also safe for sensitive electronics like laptops and medical equipment, unlike cheaper modified sine wave inverters.
This Renogy 3000W inverter is built for systems running demanding tools and appliances that smaller inverters can’t reliably handle. Overall, this Renogy 3000W inverter is worth the investment if you’re running tools or appliances that smaller inverters can’t reliably handle.
Wiring gauge and fusing matter more at this power level, so make sure your cable run and overcurrent protection are rated for the full continuous draw before flipping it on for the first time.

Victron has a strong reputation in the DIY solar world, and this pure sine inverter with GFCI is a good example of why. It delivers 1200VA of clean 12V-to-120V power, and unlike a lot of inverters that leave you sourcing your own GFCI outlet separately, this one has it built right in.
That GFCI outlet isn't just a nice extra — it's often required by code anywhere power is used near water, which covers a lot of RV and boat setups: bathrooms, galleys, and outdoor outlets all typically call for ground fault protection. Having it built into the inverter itself means one less thing to wire in separately and one less place for a DIY wiring mistake to hide.
At 1200VA, this inverter is sized for everyday essentials — lights, chargers, a laptop, a small fridge, entertainment electronics — rather than heavy-draw appliances. It's a good match for a boat, a smaller RV, or a modest off-grid cabin where reliability and clean power matter more than sheer wattage.
Before you buy, add up what you'll actually run at the same time so you're not caught short — our guide on Solar Inverter Sizing walks through exactly how to do that math without overbuying.
If you're weighing options, a plain pure sine inverter without GFCI will usually cost a bit less, but you'll end up buying and wiring a separate GFCI outlet anyway if your setup needs one — which most RVs and boats do. Paying a little more upfront for a pure sine inverter with GFCI already integrated tends to be the simpler, cleaner path, and it's one less connection that can work loose over time.
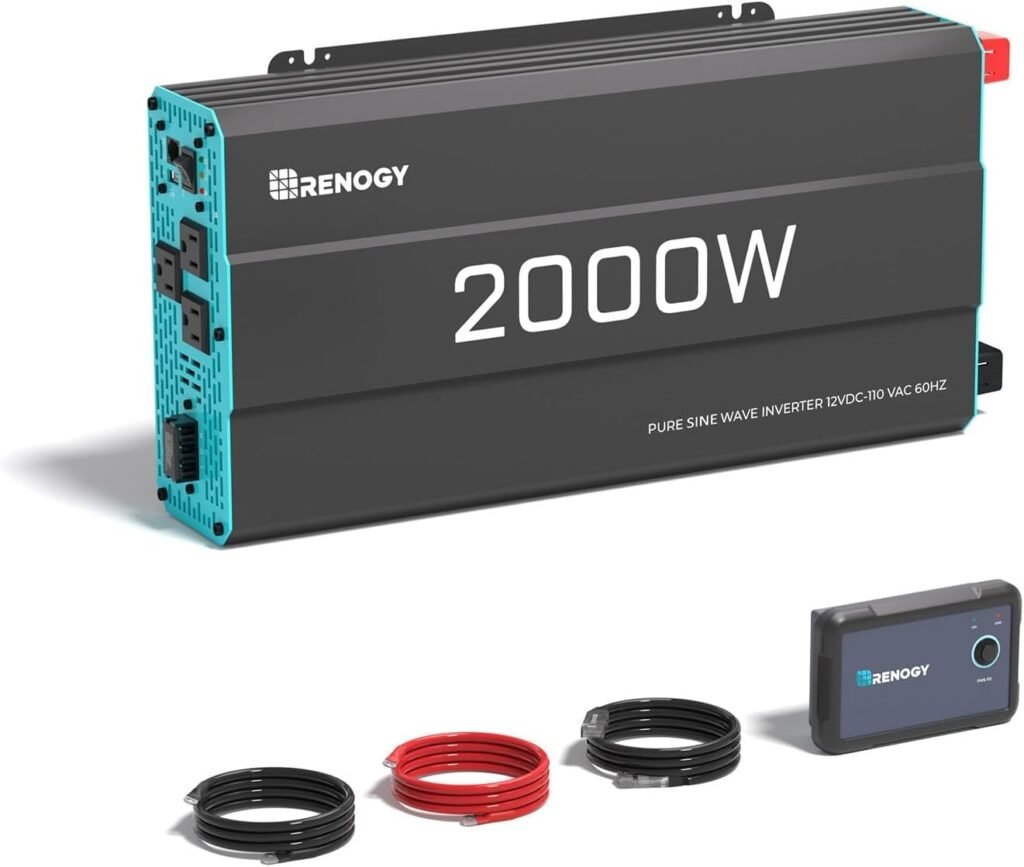
If a 1000 watt inverter feels like it'll leave you rationing power, Renogy's P2 2000 watt pure sine inverter is the step up. It's still true pure sine wave output — safe for sensitive electronics and motors — but with double the continuous capacity, so you're not stuck choosing between running the microwave or charging your tools.
At 2000 watts continuous, this inverter can handle a microwave, a coffee maker, power tools, a small window AC unit for short stretches, or several smaller devices running at the same time. The P2 series also carries a solid surge rating for the split-second power spike that motors and compressors need to start up, which is where a lot of cheaper inverters trip out and shut down.
The tradeoff for that extra capacity is current draw. A 2000 watt pure sine inverter pulling full power from a 12V bank draws upwards of 170 amps, which demands serious cable gauge and a properly rated fuse right at the battery. If you're running loads this size regularly, it's also worth considering a 24V battery bank instead of 12V, since it cuts that current draw roughly in half for the same power output.
Before you buy, it's worth confirming 2000 watts is actually the right number for your loads rather than just picking the bigger option. Our guide on Inverter Sizing walks through how to add up your real power draw so you land on the right size the first time.
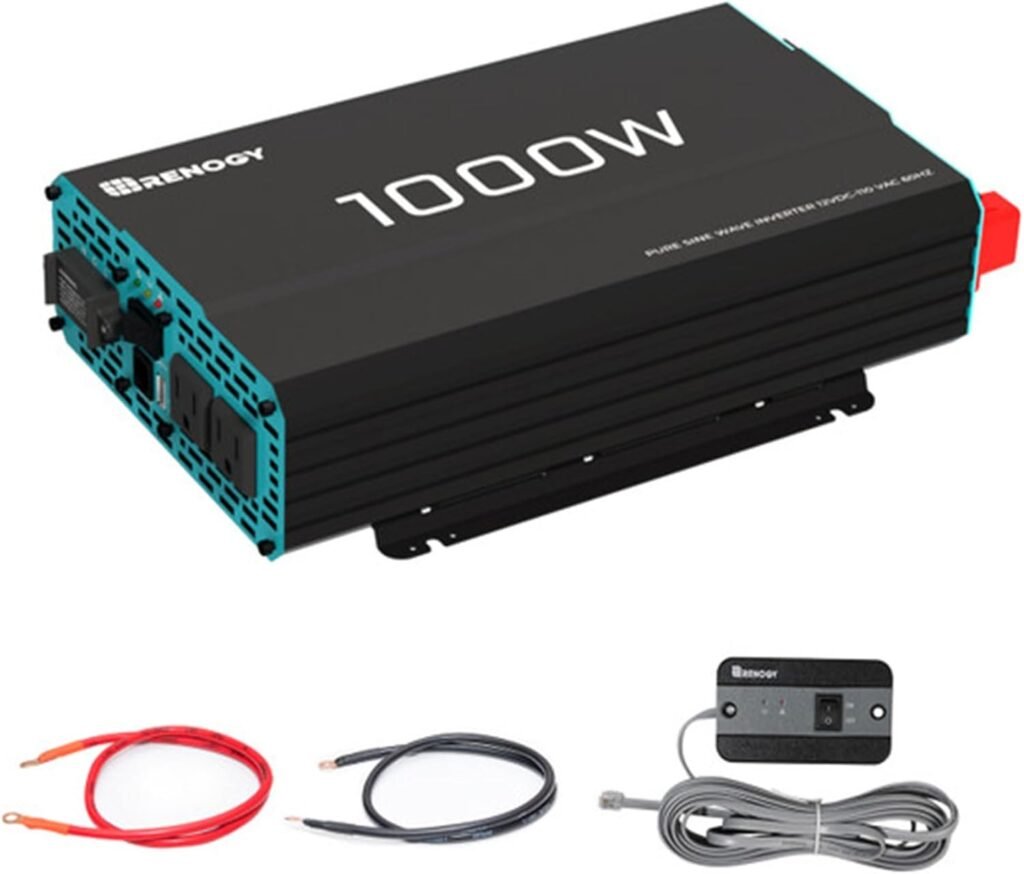
Once your battery bank is charged up, you need a way to actually use that power for normal household stuff, and that's where this Renogy 1000 watt pure sine inverter comes in. It takes 12V DC straight from your battery and converts it into clean 120V AC — the same kind of power that comes out of a wall outlet at home.
The "pure sine wave" part matters more than it might sound. Cheaper modified sine wave inverters produce a rougher, choppier version of AC power that can make sensitive electronics run hot, buzz, or behave oddly, and it can straight-up damage certain motors and medical devices over time. A pure sine inverter like this one produces power that's essentially identical to what your house delivers, so your laptop charger, CPAP machine, or kitchen appliances run exactly like they would at home. If you want the full breakdown of why this distinction matters, we cover it in Solar Inverter Types.
At 1000 watts continuous, this inverter can handle a laptop, a TV, kitchen gadgets, phone chargers, a CPAP, or power tools — just not all of them flat-out at once. It's not sized for a well pump or central air, but for a well-equipped RV, a small cabin, or a home backup setup, it covers the everyday essentials without issue.
One thing worth knowing before you wire it up: a 1000 watt pure sine inverter running at full load pulls close to 85 amps from a 12V battery, which is a serious amount of current. Use heavy-gauge cable for the DC connection and don't skip a properly rated fuse right at the battery — this isn't a spot to improvise.
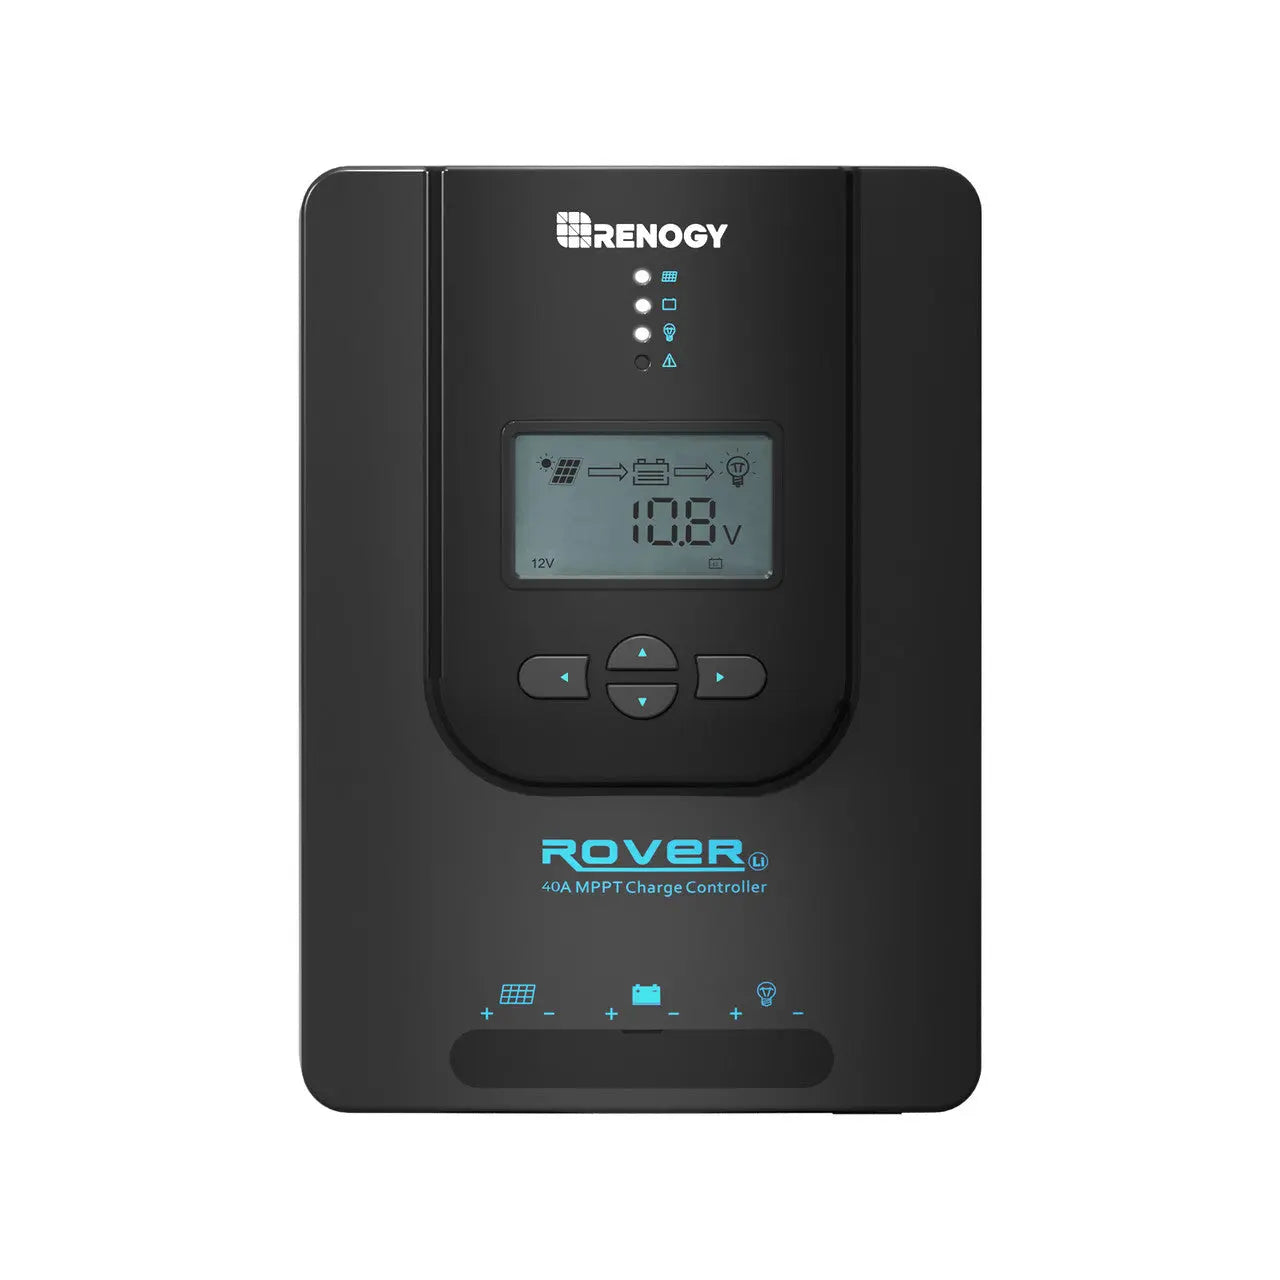
The Renogy Rover 40A is a step up from the smaller Rover controllers, giving you enough charging capacity to handle a mid-size solar array without upgrading to a full 60A controller. MPPT technology means it's squeezing more usable power out of your panels than a cheaper PWM controller would, especially in partial shade or cooler weather.
It's a good fit once your system grows past a single small panel — think two or three 100–200 watt panels wired together — and you want a controller with enough headroom that you're not maxing it out on day one. Like the rest of the Rover line, it's built for DIY installs, with straightforward wiring and a display you can actually read at a glance.
Once it's installed, dial in the right settings using our guide on solar charge controller settings so you don't shorten your battery life.
The Renogy Rover 40A supports both 12V and 24V battery systems and includes an LCD display so you can check charging status without pulling out your phone. Compared to a basic PWM controller, its MPPT tracking squeezes more usable power out of your panels, especially during partial shade or cooler mornings when voltage output shifts. It's a solid mid-tier pick for anyone running two or three mid-size panels.

The Renogy Rover 60A is the controller to reach for once your solar array starts getting serious — enough capacity to handle a full-size off-grid or cabin system without needing to split your panels across multiple controllers. It uses the same MPPT tracking as the rest of the Rover lineup, which means better real-world efficiency than a basic PWM controller, especially as panel count and wiring runs grow.
If you're building toward a larger battery bank and don't want to outgrow your charge controller in a year, sizing up to the 60A model now is usually cheaper than replacing a smaller one later. It's a sensible core component for anyone planning a system in the 1,500–3,000 watt solar range.
As with any MPPT controller, proper setup matters — see our guide on charge controller settings to avoid killing your batteries.
Like the rest of the Rover line, the Renogy Rover 60A supports both 12V and 24V systems and includes an LCD display for at-a-glance monitoring. Its higher amperage rating gives you headroom to add panels later without needing to size up again, which matters if you're planning to grow your system rather than build it all at once.
The Renogy Rover 60A is a reliable core component for anyone building out a mid-to-large solar array rather than a small single-panel setup. Overall, the Renogy Rover 60A is a smart choice if you expect your array to keep growing rather than staying fixed at its current size.
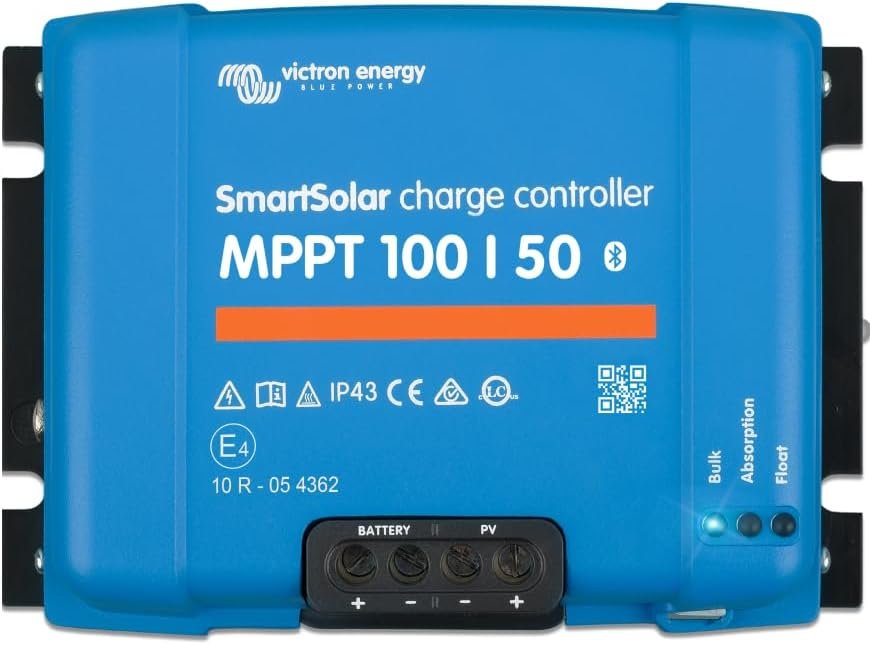
The SmartSolar is Victron's step up from the BlueSolar line, and this 50 amp MPPT charge controller adds built-in Bluetooth so you can check your charging stats, adjust settings, and troubleshoot straight from your phone using Victron's free VictronConnect app — no separate display or dongle needed.
That extra visibility matters more than it sounds. Once the controller is talking to your phone, dialing in the right charge parameters for your specific battery chemistry gets a lot easier — we cover the settings worth double-checking in MPPT Controller Settings: 5 That Actually Matter.
At 50 amps and 100V input, this controller can comfortably handle around 700 watts of panels on a 12V system or up to 1,400 watts on 24V, which puts it in the sweet spot for larger RV roofs, skoolies, and small off-grid cabins running more than one battery. It's overkill for a single 100-watt panel, but if you're planning to expand your array down the road, sizing up front saves you from buying a second controller later.
For anyone running lithium batteries or juggling multiple charge sources, the Bluetooth monitoring on this 50 amp MPPT charge controller is worth the price difference over BlueSolar — being able to glance at your phone and see exactly what your panels and batteries are doing takes a lot of the guesswork out of a DIY system.
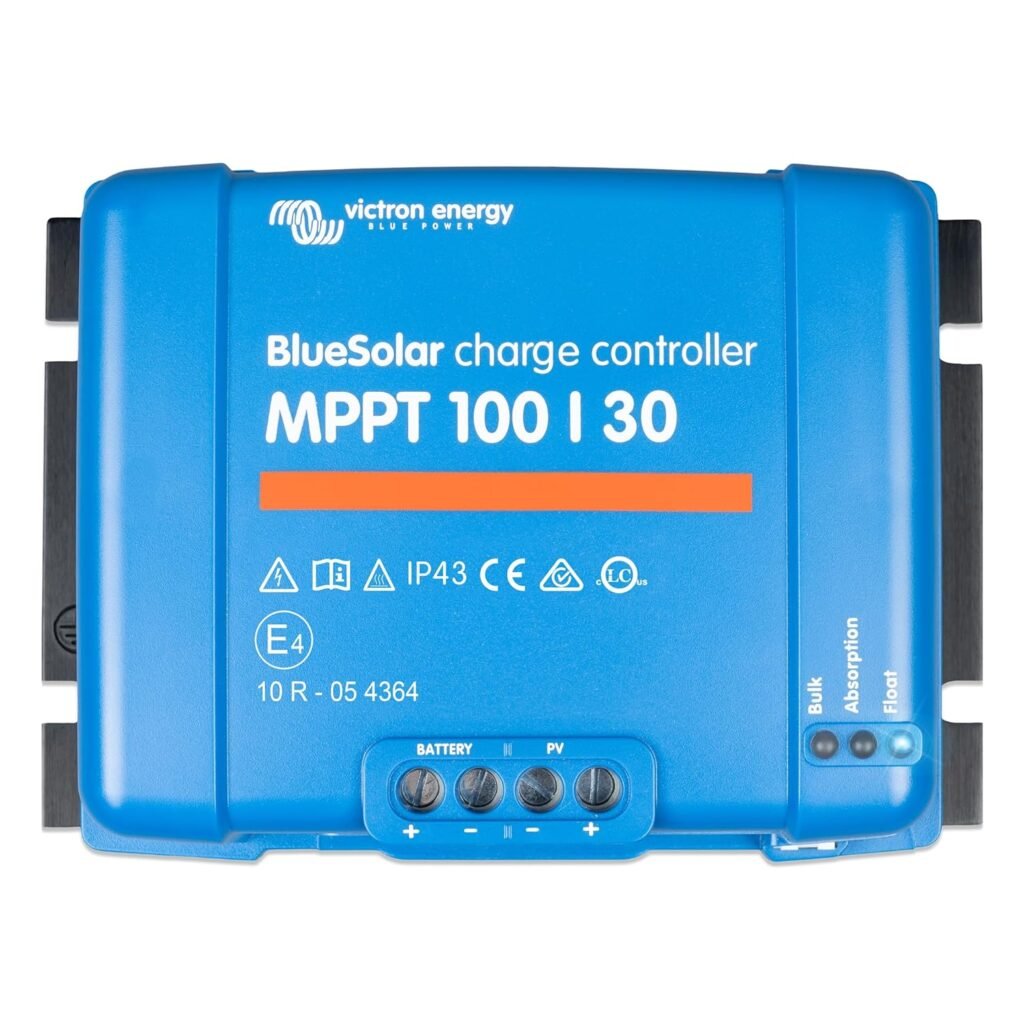
Victron's BlueSolar line is the budget-friendly sibling to their Bluetooth-equipped SmartSolar controllers, and this 30 amp MPPT charge controller is a great pick if you don't need app monitoring and just want a reliable, well-built controller managing your panels. It still gets you all the core benefit of MPPT technology — squeezing more usable power out of your panels than a cheaper PWM controller would, especially in cooler weather or hazy conditions.
If you're not sure why that distinction matters, or whether MPPT is worth the extra cost over a PWM controller for your setup, we break it all down in MPPT vs PWM Charge Controllers.
In practical terms, a 30 amp MPPT charge controller like this one can handle roughly 400 watts of panels on a 12V system, or up to about 800 watts if you're running a 24V setup — plenty of headroom for most RV, van, and small cabin arrays. The 100V input rating also means you can wire panels in series rather than parallel, which cuts down on wiring and voltage drop for panels mounted farther from your battery bank.
If your priority is keeping your battery bank protected and your budget in check rather than checking stats on your phone, this controller is a solid, no-frills choice that Victron's build quality backs up.
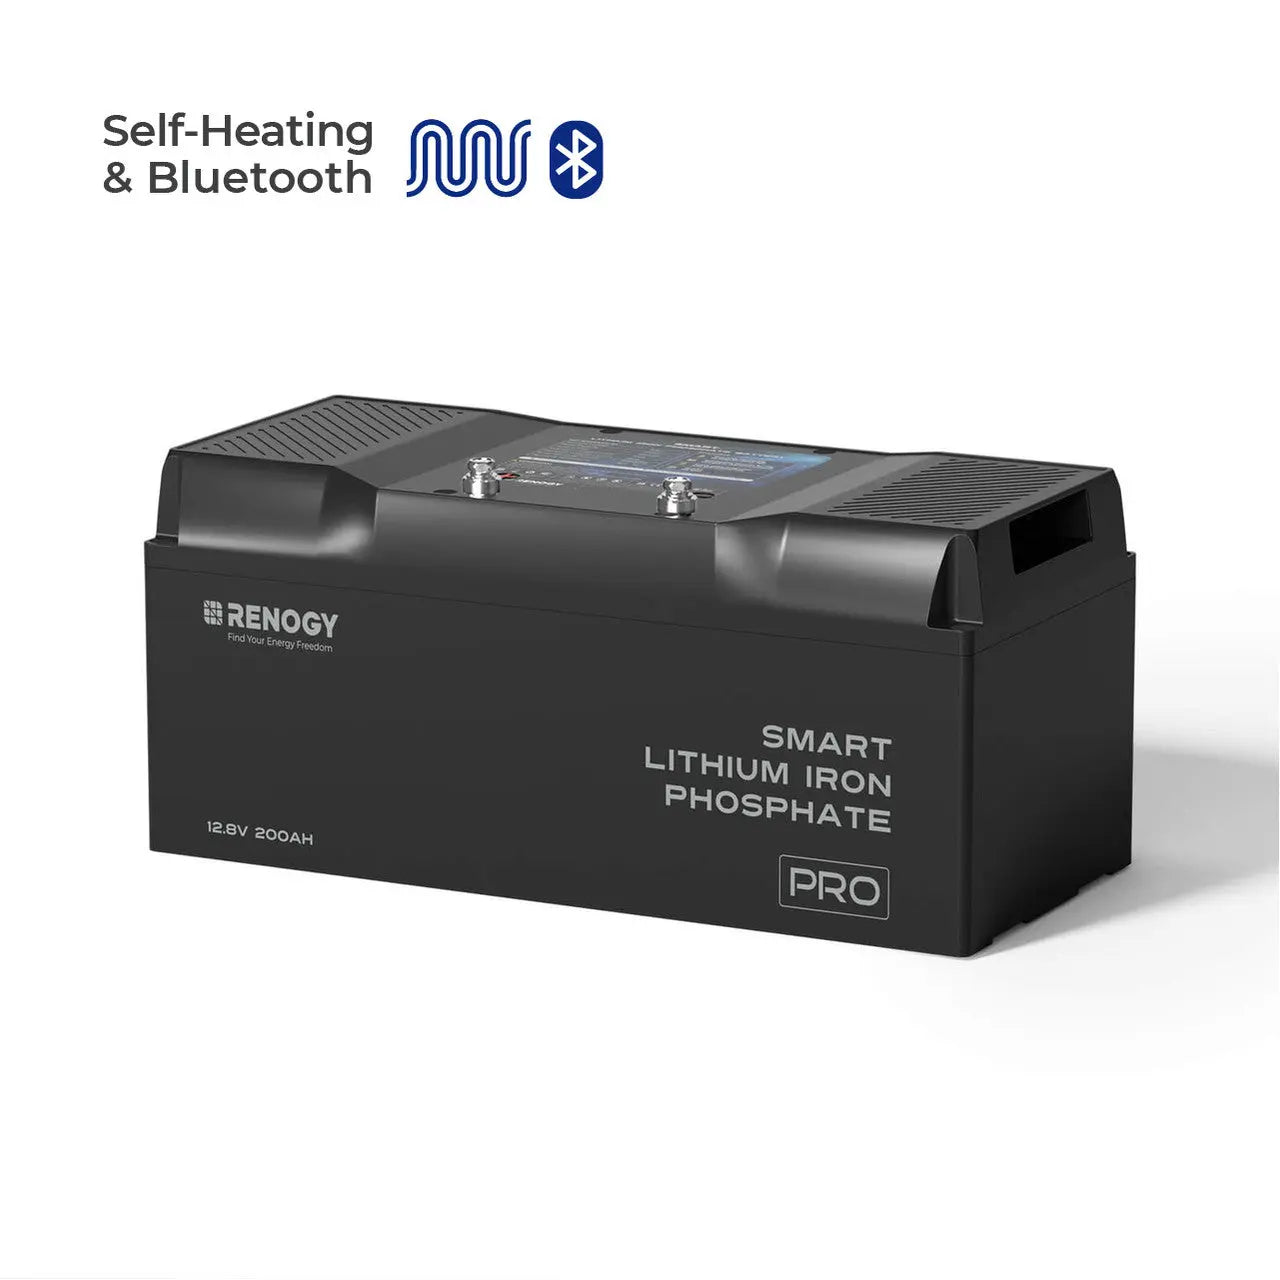
This 200Ah battery from Renogy's Pro Series is built for people who've outgrown a single 100Ah battery and need real capacity in one unit rather than wiring multiple batteries in parallel. At 12V and 200Ah, it holds roughly 2,560Wh of usable energy, and the self-heating function means it can charge safely even in cold weather that would otherwise shut a standard LiFePO4 battery down.
Bluetooth monitoring lets you check state of charge and battery health from your phone instead of guessing, which matters more than people expect once a battery bank is buried behind other equipment. It's a solid core battery for a serious cabin, RV, or home backup system built around a single high-capacity unit.
Not sure how many of these you need? Our RV battery bank sizing guide walks through the math.
This Renogy 200Ah LiFePO4 battery includes Bluetooth monitoring through Renogy's app, so you can check state of charge, temperature, and cycle count without opening up the battery compartment. Its self-heating function also allows charging in cold weather that would otherwise damage a standard lithium battery. At 200Ah, it's sized for a serious off-grid battery bank rather than a small starter system.
This Renogy 200Ah LiFePO4 battery is a practical building block for anyone assembling a larger bank rather than relying on a single small battery. Overall, this Renogy 200Ah LiFePO4 battery is worth considering for anyone building a battery bank meant to last for years of regular cycling.
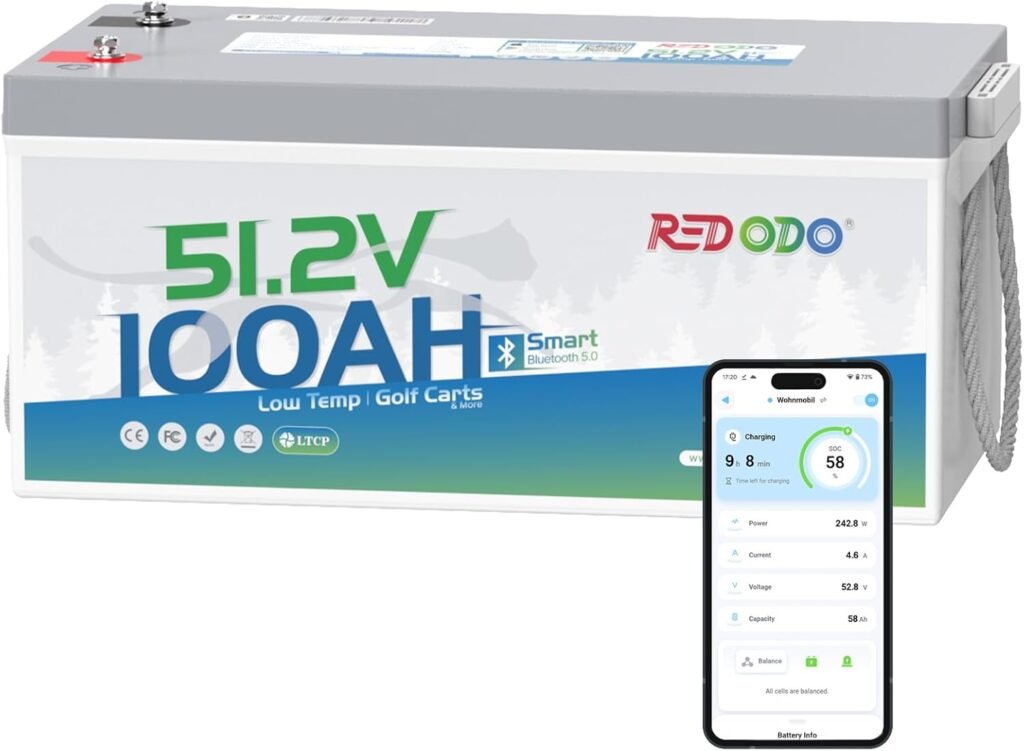
This Redodo Bluetooth lithium golf cart battery pairs the same 100Ah capacity as a standard 48V pack with a smart BMS, so you can check state of charge, temperature, and cell balance right from your phone instead of guessing based on a basic voltage meter.
That kind of visibility is especially useful if you're using this Bluetooth lithium golf cart battery for a mobile or seasonal setup — an RV, golf cart, or boat you don't check on daily — since you can glance at the app before a trip rather than finding out your battery's low after you've already loaded up. If you're trying to figure out how many of these you'd need for a road trip or extended stay, our RV Battery Bank Size: Calculate Without Regrets walks through the numbers.
Functionally it performs the same as a standard 48V 100Ah lithium pack — expect around 5,120 watt-hours of usable capacity — but the smart BMS adds a layer of diagnostics that basic BMS units don't offer, including individual cell voltage readings that can flag a weak cell well before it becomes a real problem.
For anyone who's been burned by a mystery battery failure with no way to diagnose it, the added visibility here is worth the modest premium over a non-Bluetooth version, especially in a system you're not physically checking every day.
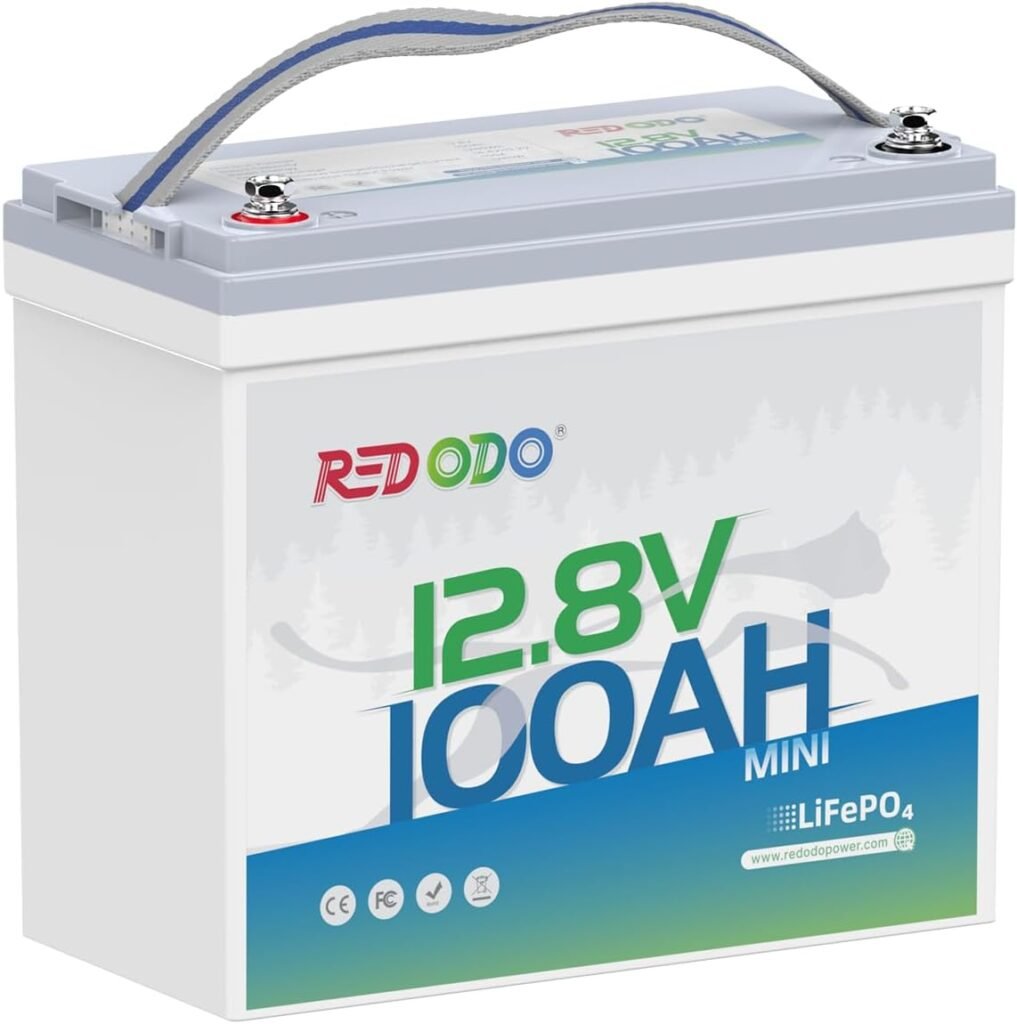
Redodo's "Mini" line takes the standard 12V 100Ah format and shrinks the footprint, which matters a lot if you're working with a tight battery compartment in a small camper, teardrop trailer, or boat. This mini 12V lithium battery gives you the same 100Ah of capacity in a case that's noticeably smaller and lighter than a standard group 24 or group 27 battery box.
The tradeoff for the compact size is usually a slightly higher price per amp-hour, but for space-constrained builds it's often worth it — squeezing a full-size battery into a mini enclosure isn't always an option. If you're still deciding between lithium and traditional AGM for your build, our Solar Battery Chemistry: AGM vs Lithium DIY Guide covers the practical differences.
What stands out here is the cycle rating — up to 15,000 cycles is well above the 6,000 you'll see on most standard LiFePO4 batteries, largely thanks to a more conservative depth of discharge rating from the manufacturer. In practice that means this mini 12V lithium battery is built to handle daily cycling for well over a decade without meaningfully losing capacity.
It's a good fit for small mobile setups — teardrops, small vans, boats, or backup power stations — where physical space is the limiting factor rather than raw capacity. If you have room for a full-size battery, you likely won't need to pay the premium for the smaller footprint.
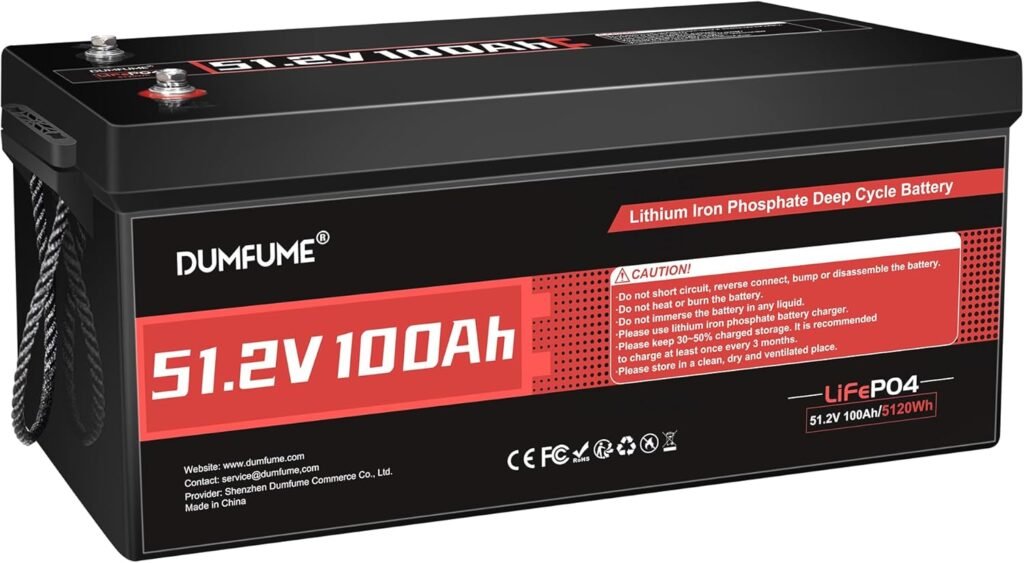
This 48V golf cart lithium battery is built around the same form factor as a traditional golf cart battery, which makes it a straightforward swap if you're upgrading an existing cart or building a higher-voltage off-grid system from scratch. At 100Ah and 48V, you're looking at roughly 5,120 watt-hours of usable capacity per battery.
The higher voltage matters for anything drawing serious current — inverters, well pumps, or larger appliances — because you get the same power at a fraction of the amperage compared to a 12V system, which means thinner wire and less voltage drop. If you're not sure how many of these you'd need for your setup, our Battery Bank Sizing Calculator: Get the Right Setup walks through the math.
The included 200A BMS is sized to match the battery's higher voltage and current demands, protecting against over-discharge, overcharge, and short circuits automatically. With a rated 6000+ cycles, this 48V golf cart lithium battery should easily outlast the cart or system it's installed in.
Beyond golf carts, these are a popular choice for small off-grid cabins and workshop setups where 48V equipment is already in play — just make sure your inverter and charge controller are rated for 48V before you commit to this format.
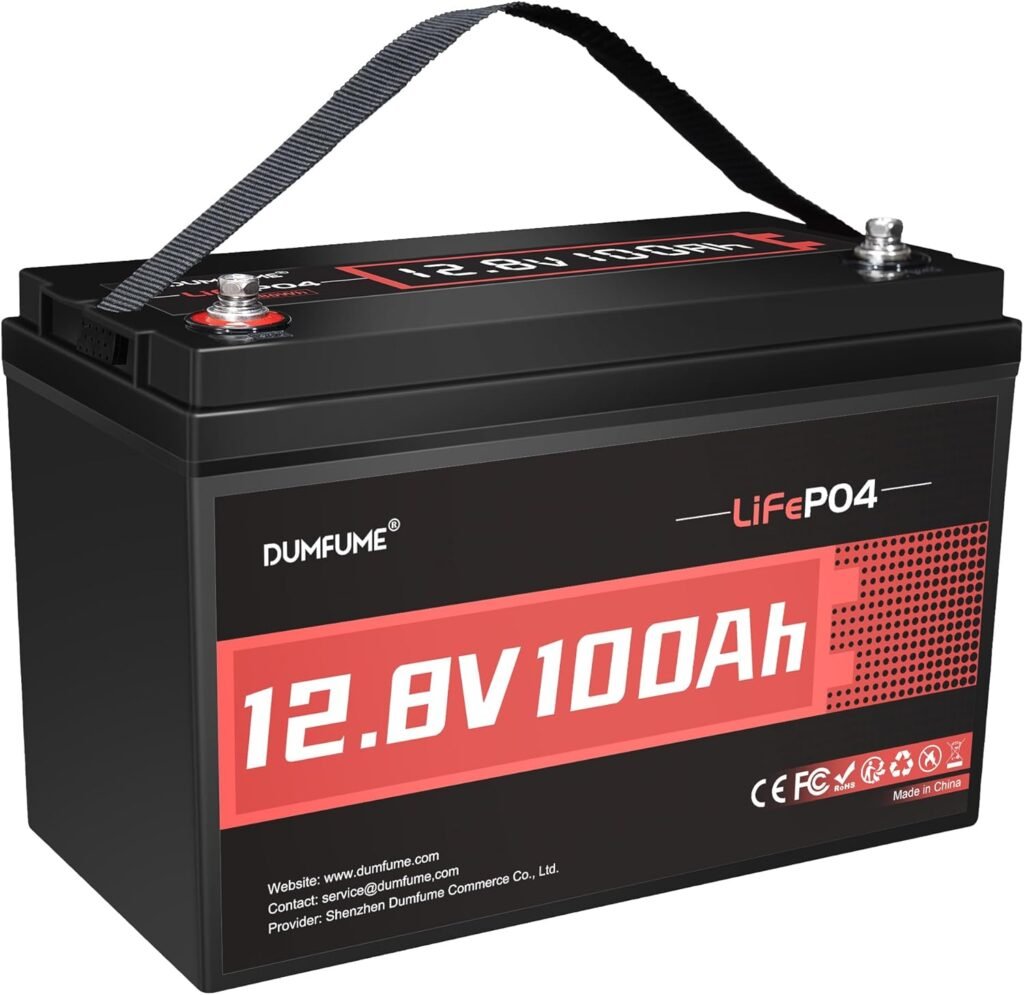
A 12V 100Ah LiFePO4 battery is the standard building block for most DIY solar setups, and this one hits that sweet spot of capacity, weight, and price that makes it easy to recommend as a starting point or a drop-in upgrade from lead-acid. The built-in 100A BMS handles cell balancing and protection automatically, so you get the safety of a professionally managed battery without needing a separate battery management setup.
If you're trying to decide whether lithium is worth the higher upfront cost compared to AGM, it usually comes down to how you'll use the battery — we walk through the tradeoffs in AGM vs Lithium: Solar Battery Chemistry Guide for DIY.
In an RV or van, a single 12V 100Ah LiFePO4 battery gives you around 1,280 watt-hours of usable capacity — enough to run a fridge, lighting, and small electronics for a day or two between charges. For a home backup setup, most people wire several of these in parallel to build a larger bank sized around their actual daily usage rather than relying on one battery to do everything.
The rated 6000+ cycle life is the real selling point here — at a full cycle a day, that's more than 16 years of use, far outlasting any AGM battery and making the per-cycle cost of this 12V 100Ah LiFePO4 battery lower than it looks on the price tag alone.

Solar wiring isn’t one-size-fits-all — the right cable depends on your system’s voltage, the current it’s carrying, and how far the run is between components. Renogy’s wiring lineup covers the connectors and cable gauges most DIY systems need, from panel-to-controller runs to heavier battery cables.
Rather than sourcing generic wire and guessing at gauge and connector compatibility, buying wiring designed for solar installs takes some of the guesswork out of getting the right cable for each specific run in your system.
Picking the right gauge matters as much as the connectors — use our solar wire gauge calculator before you buy.
Beyond just wire gauge, having the right Renogy wiring and connectors, MC4s for panel-to-panel connections, ring terminals for battery posts, is what actually makes a wiring job look and function like it was done properly rather than improvised. Buying a set upfront saves multiple trips back to the store mid-install.
A Renogy wiring and connectors set is worth buying upfront rather than assembling piecemeal mid-install. Overall, a Renogy wiring and connectors set is worth buying upfront rather than assembling piecemeal partway through your install.
Match connector types across your whole system rather than mixing brands — MC4-style connectors from different manufacturers don't always mate reliably, and a loose crimp or a corroded lug is a common cause of voltage drop that's hard to diagnose later. Strip length, crimp force, and heat-shrink coverage all matter more than they seem like they should.
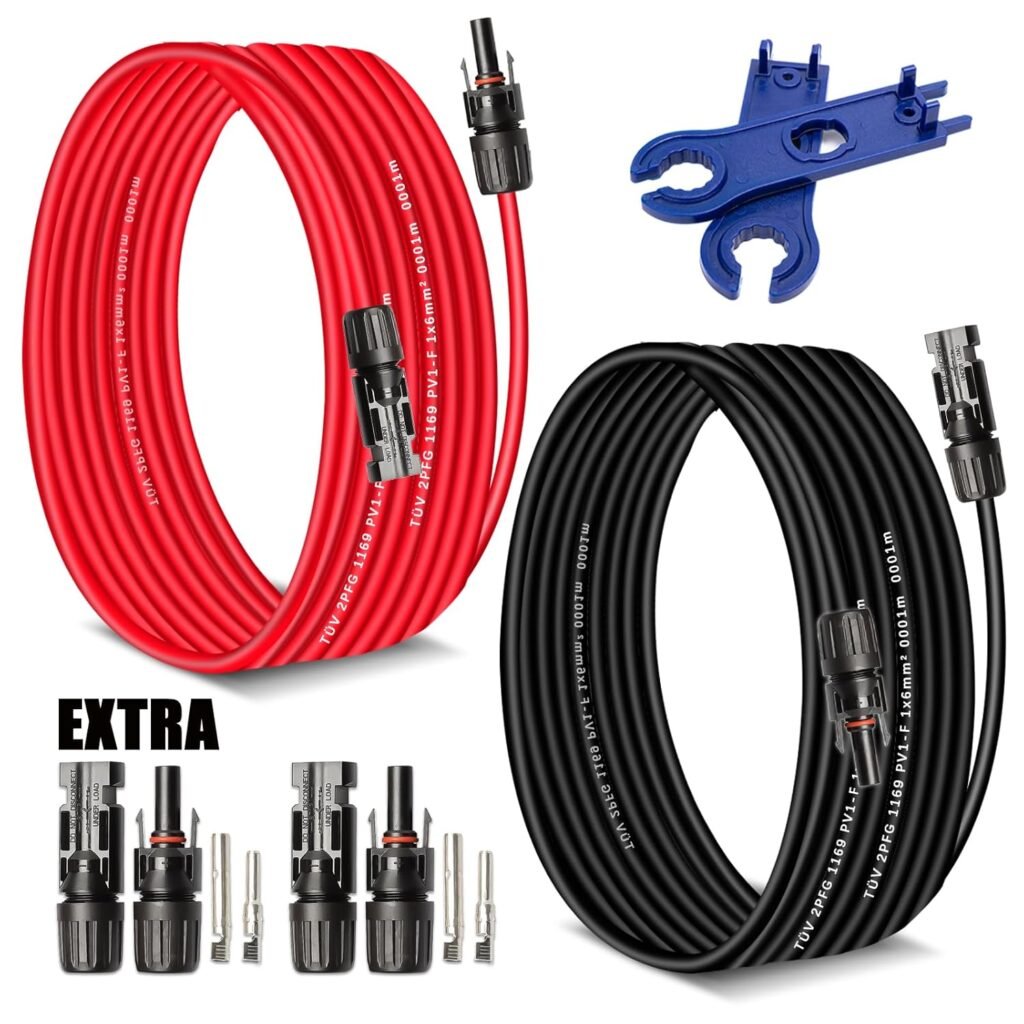
A solar extension cable like this one solves a problem almost every DIY installer runs into eventually: your panels are mounted somewhere the factory cables just don't reach your charge controller or combiner box. At 30 feet with 10AWG conductors and standard male/female connectors, it's a drop-in extension that matches the connector type most panels ship with.
10AWG is worth paying attention to here — using an undersized extension cable is one of the most common wiring mistakes in DIY solar, and it shows up as voltage drop and wasted power long before anything actually fails. If you want to understand why gauge matters so much over cable runs like this, check out Solar Wire Gauge: Stop Melting Your Investment.
This length works well for rooftop RV installs where your panels sit toward the front of the roof and your charge controller is near the battery bank at the back, or for ground-mount and portable setups where you want some distance between the panels and your gear. For runs longer than 30 feet, or if you're paralleling multiple panels through one extension, it's worth double-checking your total voltage drop rather than just adding cables end to end.
Keep the connectors clean and fully seated when connecting a solar extension cable to your existing panel leads — a loose or dirty connector is one of the more common points of failure in an otherwise solid system.
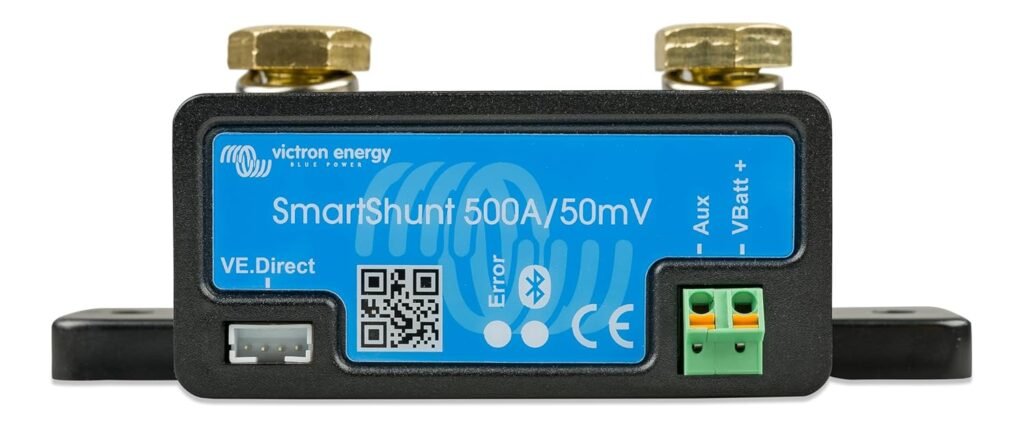
A shunt is the most accurate way to monitor a battery bank, and this Bluetooth battery monitor shunt from Victron takes the guesswork out of tracking state of charge by measuring current directly rather than estimating it from voltage alone. Voltage-based monitors get less accurate as your battery ages; a shunt-based system stays accurate for the life of the battery.
The 500 amp rating covers the vast majority of DIY solar setups, from a single battery RV system up to a decent-sized off-grid battery bank. Pairing it with the free VictronConnect app over Bluetooth means you get real-time state of charge, current draw, and time-to-empty estimates without running a wired display panel.
If you're new to system monitoring or trying to decide what's worth tracking beyond basic battery percentage, our Solar Monitoring: Track Your DIY System Like a Pro covers the metrics that actually help you catch problems early.
Installation does take a bit more care than a simple voltage meter — the shunt has to be wired into the negative battery cable in a specific location — but once it's in place, this Bluetooth battery monitor shunt gives you a level of insight that voltage-only monitors simply can't match.
If you already run a Victron Cerbo GX or color control display, this shunt drops right into that ecosystem instead of requiring a separate app. Keep in mind it monitors the battery bank as a whole rather than individual cells, so pair it with a smart BMS if you also want cell-level diagnostics.

A basic digital multimeter is one of the most useful tools you can own for a DIY solar build — checking battery voltage, verifying a panel is actually producing power, testing continuity on a wiring run before you trust it, or diagnosing why something isn't working the way it should. This Klein Tools model is auto-ranging, so you're not manually selecting a range and guessing, and it handles the voltage and current ranges a typical DIY solar system will throw at it.
If you don't already own a multimeter, this is one of the first tools worth buying before you start wiring anything — it turns troubleshooting from guesswork into a quick check.
Once your system's wired up, a multimeter is how you confirm it's actually working — see our load testing guide for what to check.
A reliable Klein Tools digital multimeter is one of the more underrated tools in a DIY solar toolkit, useful for confirming panel output, checking battery voltage under load, and tracking down wiring faults when something isn't working as expected. Klein Tools has a solid reputation for durability, which matters for a tool you'll reach for during troubleshooting.
A Klein Tools digital multimeter is a worthwhile addition to any DIY solar toolkit for ongoing troubleshooting. Overall, a Klein Tools digital multimeter is a worthwhile addition to any DIY solar toolkit, not just for installs but for years of troubleshooting.

A proper crimp on a battery cable lug is the difference between a solid, low-resistance connection and one that heats up, corrodes, or fails under load. This hydraulic crimping tool applies far more consistent pressure than a hand crimper, which matters most on the heavier gauge wire used for battery and inverter connections where a bad crimp is a real fire risk.
It comes with multiple dies to handle a range of wire gauges, from smaller accessory wiring up to the heavy cable used on inverter connections. If you're making your own battery cables rather than buying them pre-made, this is the tool that makes those crimps trustworthy.
A good crimp is only as good as the wire it's on — see our guide on solar wire gauge to match the right cable to your crimper.
A hydraulic crimping tool creates a much more secure, lower-resistance connection than a basic hand crimper, which matters most on the larger battery cables carrying real current in a solar setup. Loose or poorly crimped connections on high-current cables are a common source of voltage drop and, in worse cases, heat buildup.
A hydraulic crimping tool is worth the investment once you're working with cable heavier than a hand crimper handles well. Overall, a hydraulic crimping tool is worth the investment once you're working with cable heavier than what a basic hand crimper can handle well.
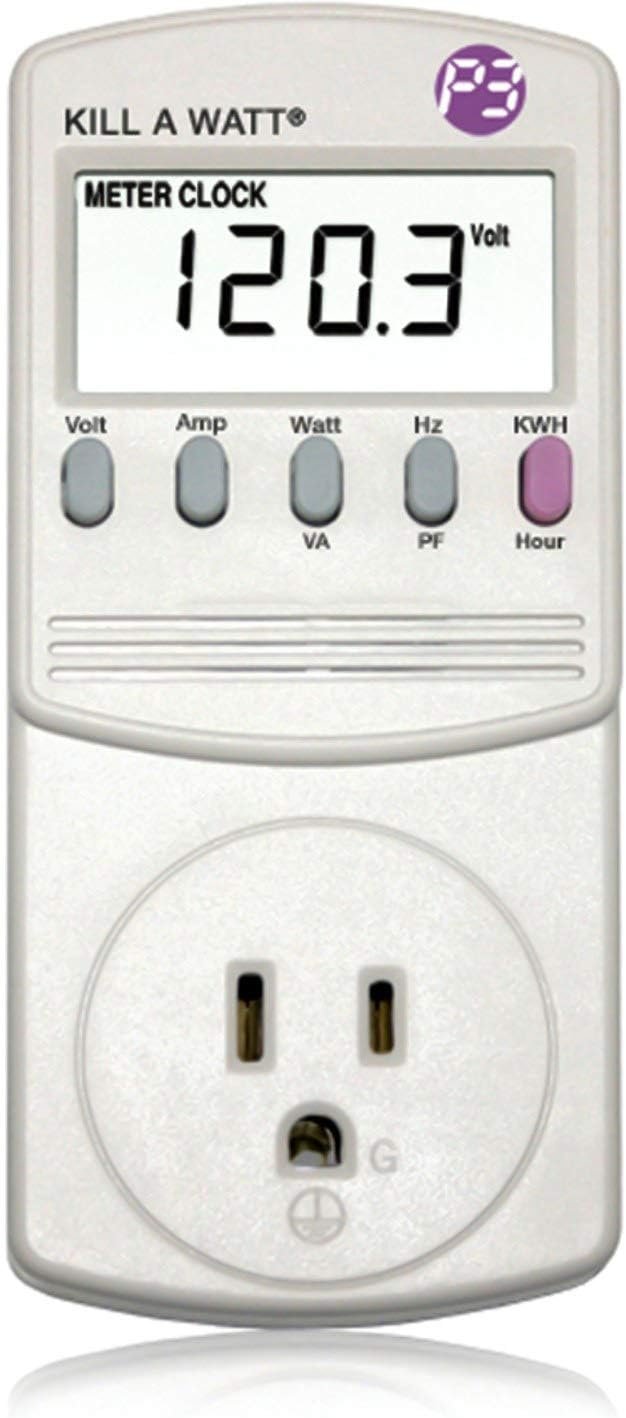
Before you spend a dollar on panels or batteries, this electricity usage monitor is one of the best investments you can make in a DIY solar project. Plug any appliance into the Kill A Watt and it tells you exactly how many watts it draws and how many kilowatt-hours it uses over time, replacing guesswork with real numbers.
This matters more than most people expect: nameplate wattage on appliances is often wildly different from real-world draw, and things like fridges and well pumps cycle on and off in ways that are hard to estimate without measuring. We cover why this step comes before sizing anything else in Efficiency First: Cutting Your Solar Needs Before You Buy.
In practice, most people use this electricity usage monitor to audit their biggest power draws — refrigerators, space heaters, water heaters, and anything with a compressor or heating element — before deciding how large a solar and battery system they actually need. Oversizing a system to cover appliances you could swap for efficient versions is one of the most expensive mistakes in DIY solar.
It's a small, inexpensive tool, but it pays for itself the first time it saves you from buying an extra battery or panel you didn't actually need.
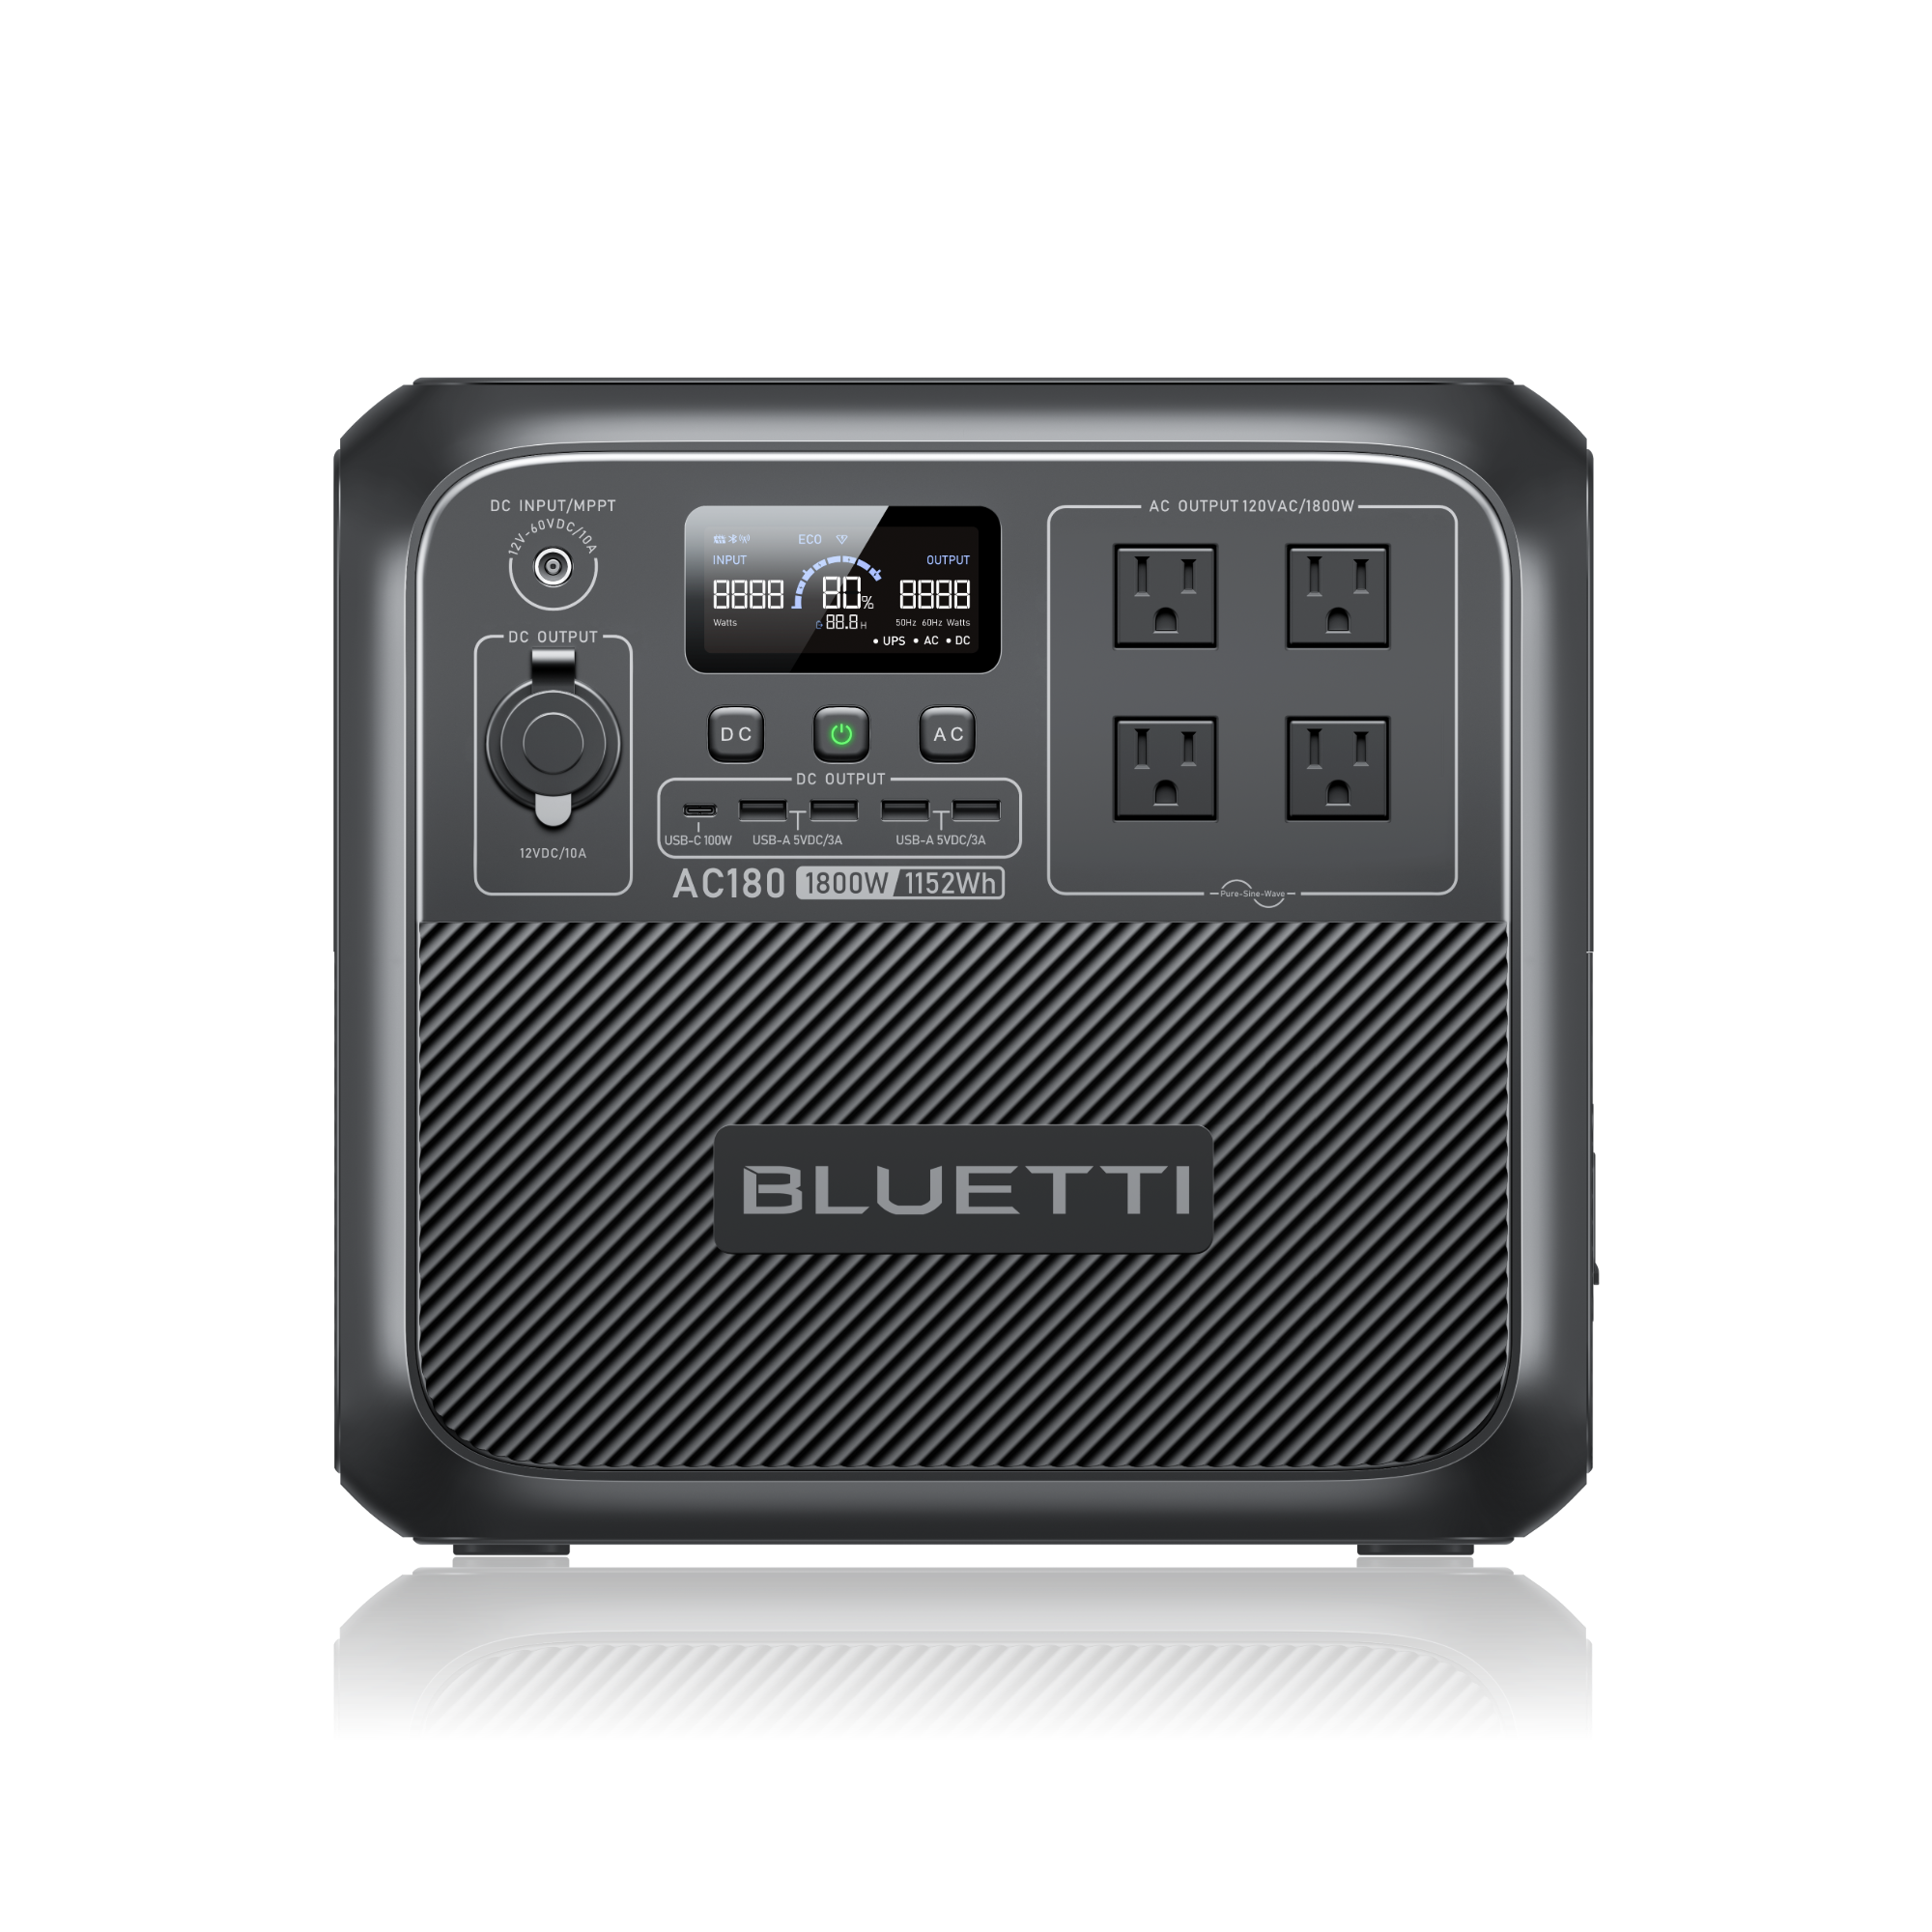
The Bluetti AC180 packs 1,152Wh and 1,800 watts of continuous output into a unit built specifically around fast, flexible recharging — it can pull power from a wall outlet, a car, a generator, or solar panels, and it's designed to charge quickly no matter which source you're using.
That flexibility makes it a good fit for people who split time between home backup and mobile use — camping, van life, or job sites — since you're not locked into one way of topping it back up. Combined with a strong reputation for value in its capacity class, it's a solid mid-tier pick if you want real output without paying whole-home-backup prices.
If you want to see how a small power station performs in a real outage, check out our step-by-step outage test of a similar unit.
The Bluetti AC180's 1,152Wh capacity sits comfortably between compact and full-size power stations, giving it enough runtime for small appliances without the bulk of the larger units. Its four recharging methods, AC, solar, car, and generator, mean the AC180 can top back up almost anywhere, which matters if you're relying on it during an extended outage instead of a weekend trip.
Between its recharge speed, portability, and enough capacity for small appliances, the Bluetti AC180 covers a lot of common use cases without the premium price tag of a larger station. It's a reasonable middle-tier pick for campers, renters, or anyone easing into backup power for the first time. Overall, the Bluetti AC180 lands in a useful middle ground for anyone who's outgrown a small power bank but doesn't need a full-size station yet.

The Bluetti AC200L is built for people who want serious backup capacity in a single unit — 2,048Wh with a 2,400 watt output, and expandable up to 7kWh with additional battery modules if your needs grow over time. That kind of headroom makes it a realistic option for home backup, not just camping or weekend trips.
Like other units in this class, it charges from multiple sources — wall power, solar, car, or generator — so you're not dependent on any single method to keep it topped up. If you want a portable unit that can genuinely stand in for a small home backup system without any wiring or permitting, this is one of the stronger options available.
Since this model supports app-based monitoring, see our guide on tracking your system like a pro to get the most out of it.
With 2,048Wh of capacity and a 2,400W continuous output, the Bluetti AC200L can run more demanding appliances than most portable units in this price range. Its app-based monitoring makes it easy to track charge and output remotely, and its expandable battery options mean the AC200L can grow alongside a system that starts small and scales up over time.
Between its capacity, output, and expandability, the Bluetti AC200L covers a lot of ground for anyone planning a serious backup power setup rather than just topping off small devices. It's a reasonable anchor unit if you expect your power needs to grow over time. Overall, the Bluetti AC200L is a strong choice for anyone who wants high capacity now with the option to expand further down the road.
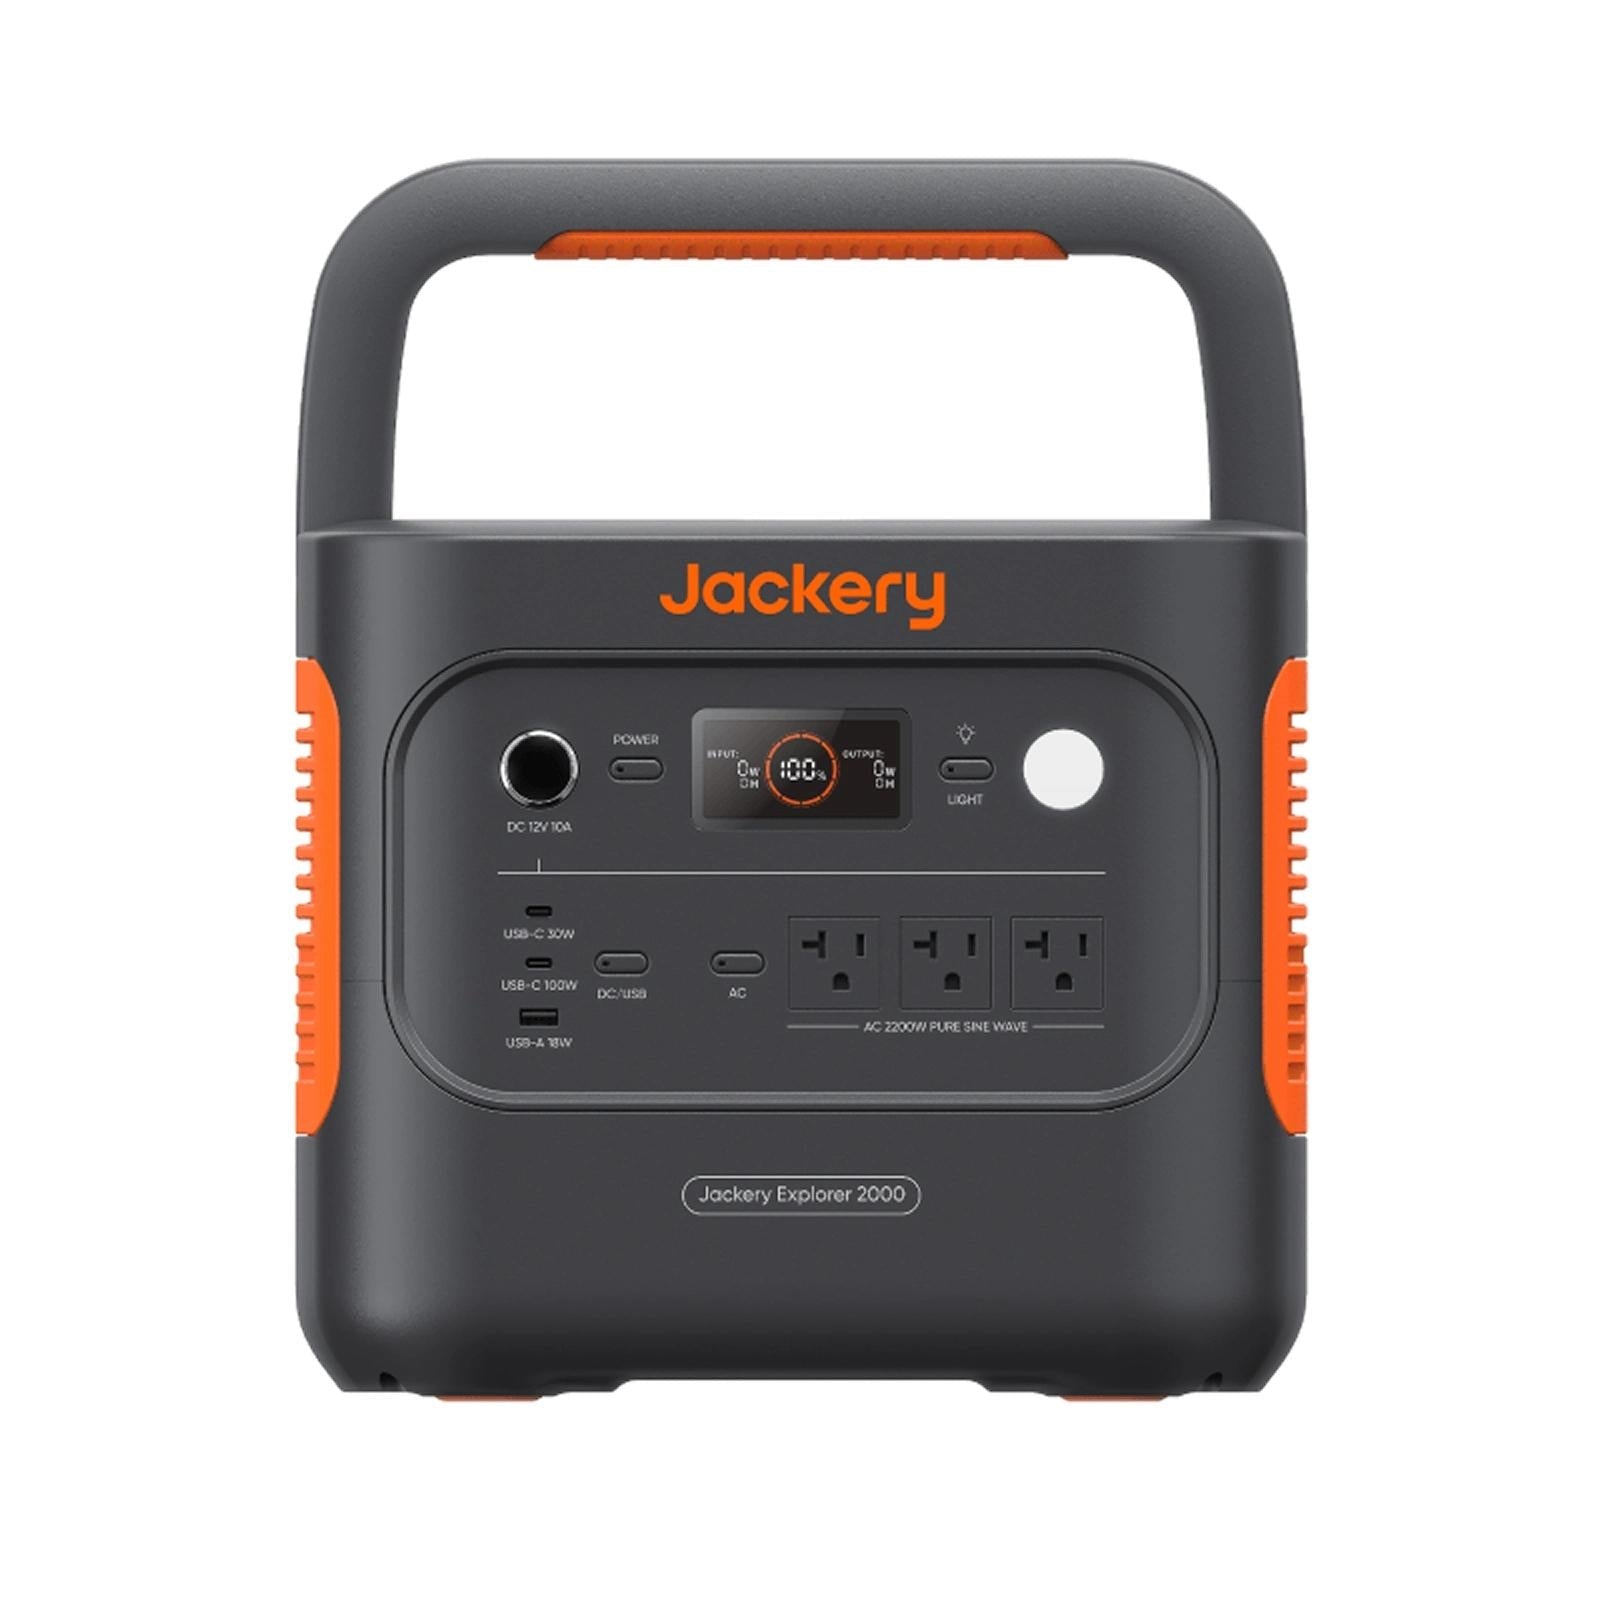
Step up from the 1000 v2 and you get the Jackery Explorer 2000 v2 — a 2,042Wh power station built for whole-home backup rather than just keeping a few essentials running. With a 2,200 watt continuous output, it can handle larger appliances like a window AC unit, a well pump, or power tools, and it's expandable with extra battery packs if you need even more capacity down the road.
Like the smaller Explorer, there's no wiring or system design involved — you're buying capacity and output in a box you can move, recharge from a wall outlet, a car, or solar panels, and put anywhere you need power. It's a solid choice for anyone who wants serious backup capacity without committing to a permanent off-grid installation.
If you're eyeing this as a step toward whole-home backup, see our breakdown on growing a starter kit into full home backup in manageable phases.
With 2,042Wh on tap, the Jackery Explorer 2000 v2 can keep a fridge, some lighting, and a few small appliances running through a multi-day outage. It supports solar input for recharging off-grid, and its higher-wattage AC output handles more demanding tools and appliances than a smaller unit could. If you're building toward a phased whole-home backup setup, the Jackery Explorer 2000 v2 is sized to anchor that kind of system.
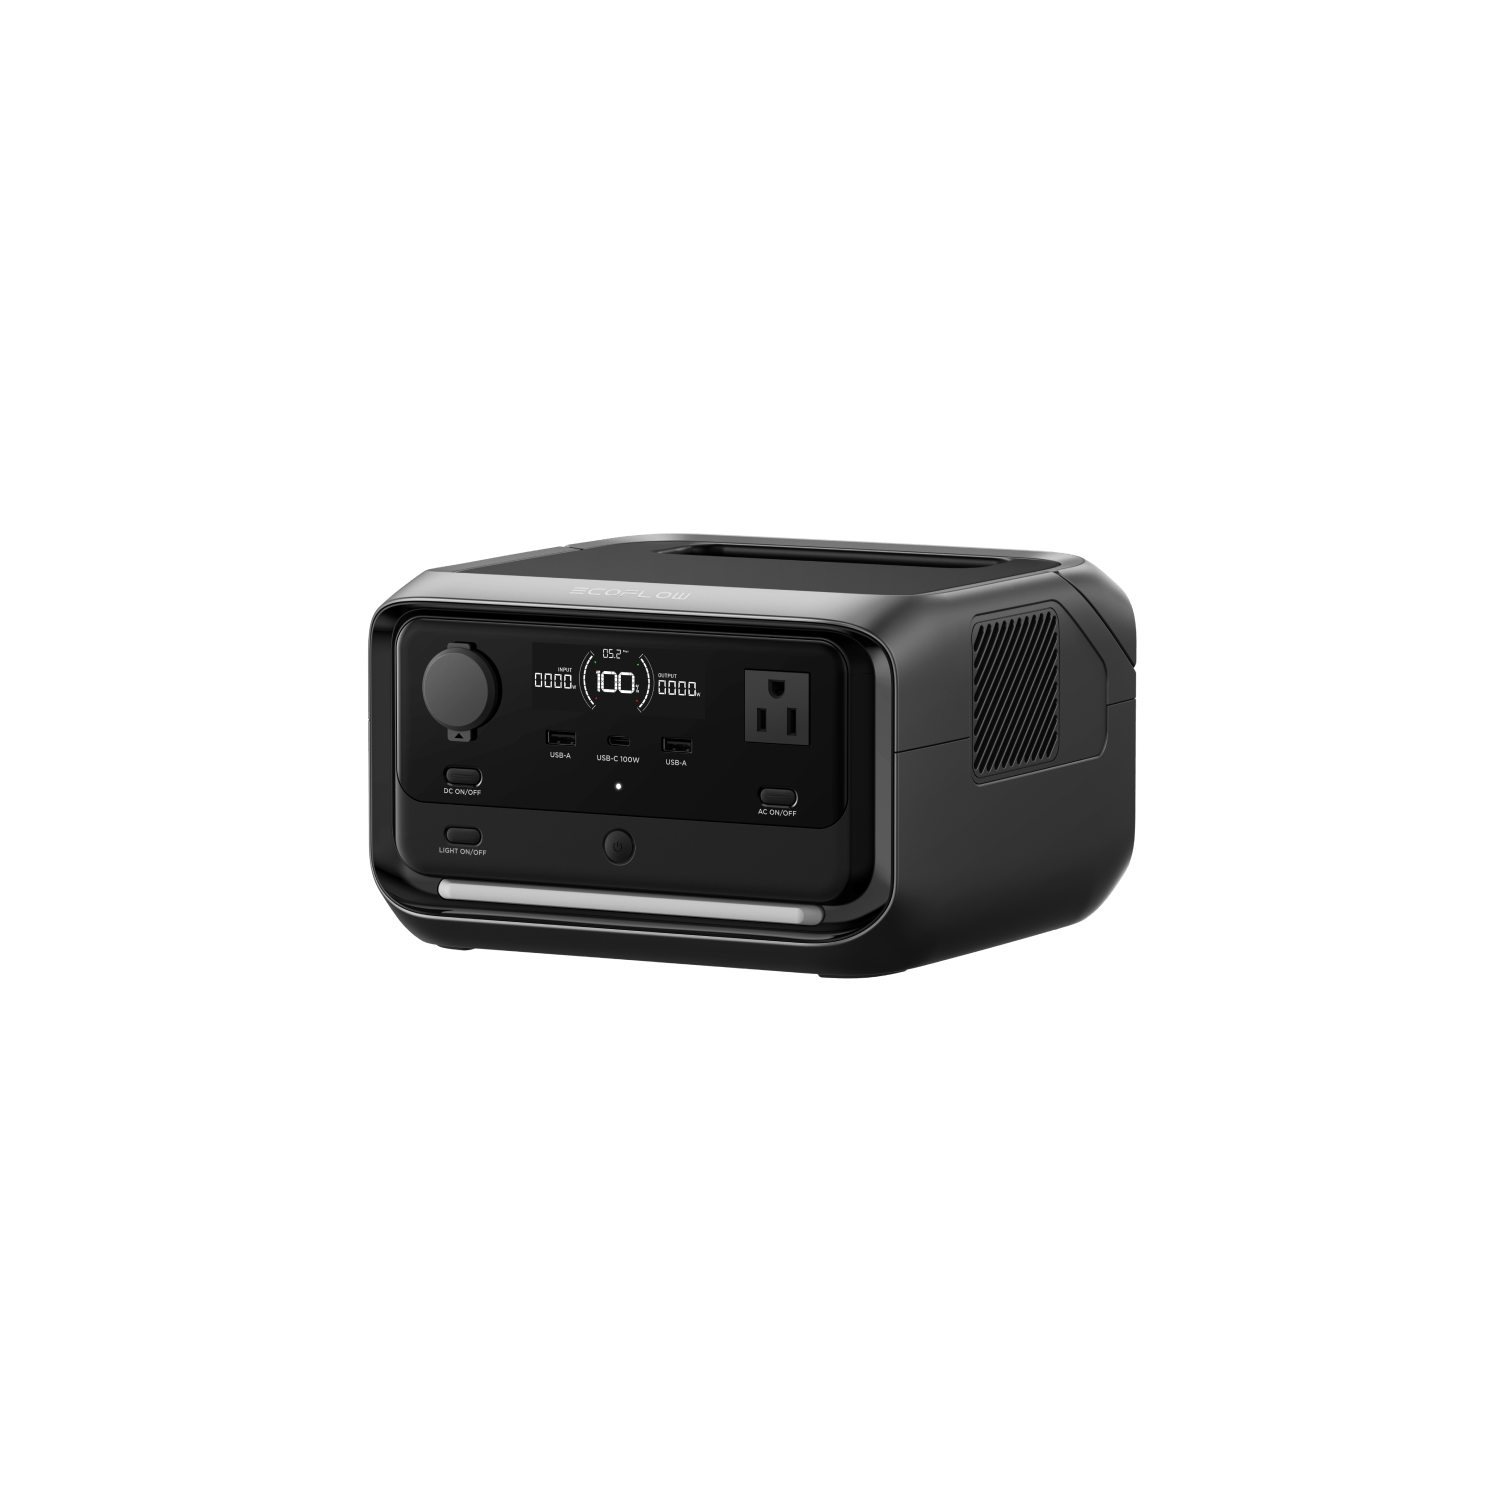
The EcoFlow River 3 Plus is a compact, budget-friendly entry point into portable power. At 388Wh, it won't run a house, but it's built for exactly what a lot of people actually need: keeping phones, laptops, small fans, and CPAP machines running through a short outage or a weekend off-grid.
Its small size and weight make it easy to toss in a car or a closet and forget about until you need it, and it recharges fast — from a wall outlet, a car port, or a compatible solar panel. If you're looking for an affordable way to get a taste of backup power before scaling up to something bigger, this is a reasonable place to start.
If you're renting and can't install a fixed system, our renters' guide to portable power covers exactly this kind of setup.
At 388Wh, the EcoFlow River 3 Plus won't run a whole household, but it's built for exactly the situations where a full power station is overkill: charging phones and laptops, running a CPAP overnight, or keeping small electronics alive during a short outage. Its compact size and fast recharge speed make the EcoFlow River 3 Plus easy to keep charged and ready without dedicating much space to it.
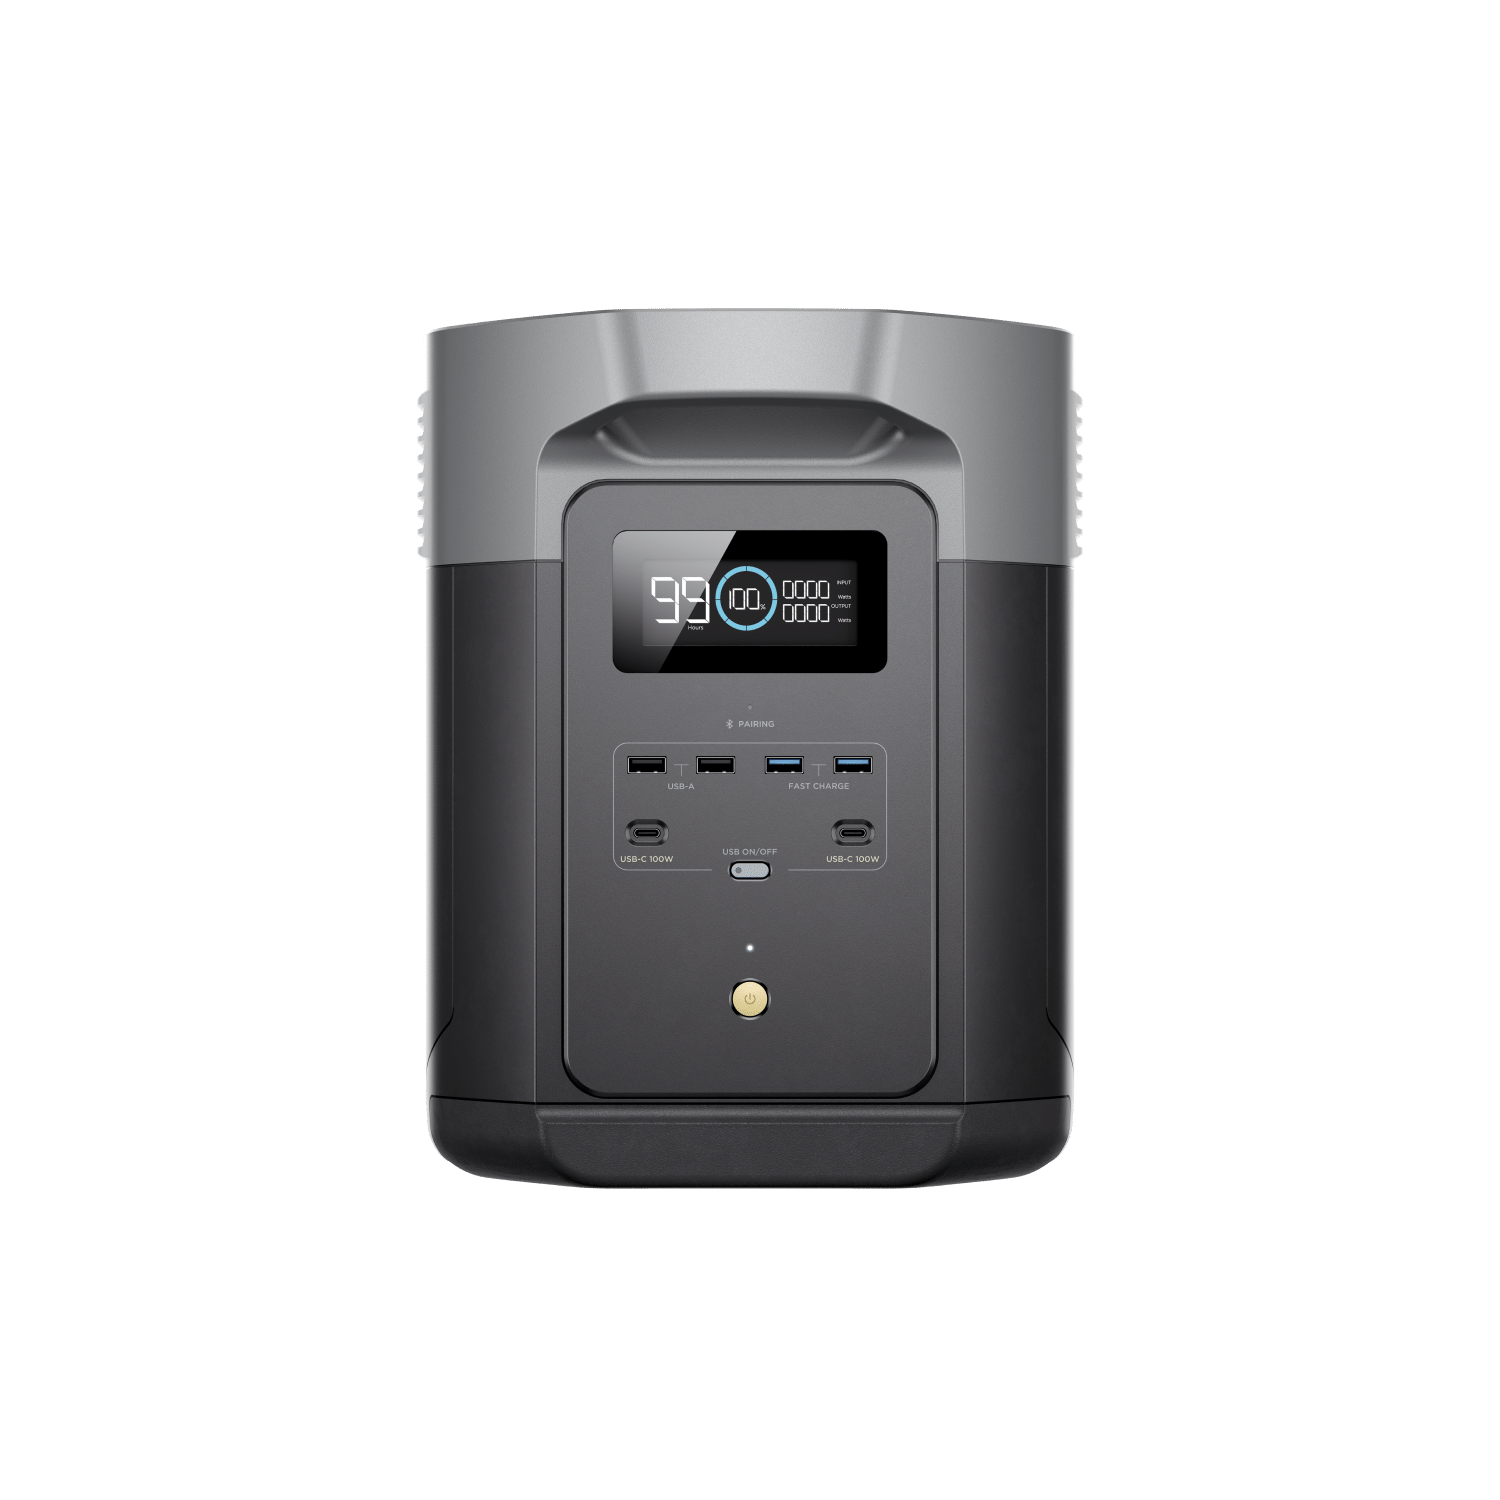
The EcoFlow Delta 2 Max steps up from the standard Delta 2 with roughly double the capacity, 2,048Wh, while keeping the same fast-charging design. It can go from empty to 80 percent in under an hour on AC power, and its 2,400W output (3,400W with X-Boost) is enough to run space heaters, hair dryers, and other high-draw appliances that trip up smaller units.
Like the rest of the Delta line, it's expandable with add-on batteries if your power needs grow, and it doubles as a capable solar generator when paired with a portable panel. For anyone who wants serious backup capacity without moving up to a whole-home system, the Delta 2 Max hits a strong middle ground between portability and runtime.
For a deeper look at building emergency backup capacity like this, see our 72-hour power plan guide.
The EcoFlow Delta 2 Max's 2,048Wh capacity puts it in the same range as some of the larger power stations on this list, and its expansion battery compatibility means you can grow capacity later instead of buying a bigger unit outright. That flexibility makes the Delta 2 Max a solid anchor for anyone planning to scale up their backup power setup over time rather than all at once.

The Jackery Explorer 1000 v2 is one of the most popular mid-tier portable power stations on the market, and it's a genuinely useful piece of kit if you want backup power without wiring a full off-grid system. At 1,070Wh with a 1,500 watt output, it can run a full-size fridge for several hours, keep a laptop and phone charged for days, or get you through a power outage without you touching a breaker panel.
Because it's a self-contained unit, there's no sizing math, no wiring, and no permitting — you plug it in, charge it from a wall outlet or a compatible solar panel, and it's ready to go. That makes it a solid option for anyone who wants a taste of solar backup power before committing to a full DIY system, or as a portable supplement to a home setup for camping, remote work sites, or emergency prep.
If you'd rather build your own portable setup from scratch, check out our guide on building a portable backup station for a DIY alternative.
The Jackery Explorer 1000 v2 uses LiFePO4 cells rated for roughly 4,000 charge cycles, so it holds up well under regular use rather than sitting untouched in a closet. Its app-based monitoring lets you check charge level and output remotely, and the built-in handle keeps it easy to move between the house and a vehicle. For anyone building a first backup power setup, the Jackery Explorer 1000 v2 is a reasonable single-unit starting point before scaling up to a larger system.

An ANL fuse block sits between your battery bank and the rest of your system, protecting the heavy-gauge wiring that carries your highest-current loads — typically the run between your battery and your inverter. This kit includes the fuse block along with the fuse itself, sized for the higher amperage that a battery-to-inverter connection usually demands.
This is one of the components that's easy to skip when you're building on a budget, but it's protecting the wiring most likely to cause a serious problem if something goes wrong. If your system has an inverter of any real size, this is not optional safety equipment.
For more on sizing and placement, see our solar fuse protection guide.
This Renogy ANL fuse block protects the main connection between your battery bank and the rest of your system, and it's sized to handle the higher current that runs through that connection compared to smaller branch circuits. Because it comes with the fuse included, there's no need to source that part separately.
This Renogy ANL fuse block is a standard part of protecting the highest-current connection in a DIY battery bank. Overall, this Renogy ANL fuse block is a standard, inexpensive part of protecting the highest-current connection in your system.

A DC-rated circuit breaker does the same job as a fuse — protecting a section of wiring from overcurrent — but it can be reset with a flip of a switch instead of needing a replacement part on hand. That makes it a convenient choice for spots in your system where a nuisance trip is more likely, since you're not stuck without a spare fuse if it trips at an inconvenient time.
These come in a range of amperages to match different points in your system, from smaller breakers protecting individual circuits to larger ones sized for your main battery connection. Match the breaker's rating to the wire gauge and load it's protecting — an oversized breaker won't protect the wiring the way it's supposed to.
If you're deciding between fuses and breakers for this part of your system, our complete safety guide compares both.
This Renogy DC circuit breaker is available in 10A, 30A, 40A, 60A, and 80A ratings to match different points in your system, from smaller branch circuits to a main battery connection. As with any breaker, match the rating to the wire gauge and load it's protecting so it actually protects the wiring the way it's meant to.
This Renogy DC circuit breaker is a practical upgrade over fuses anywhere resetting matters more than replacing. Overall, this Renogy DC circuit breaker is a convenient upgrade over fuses anywhere in your system where resetting matters more than replacing.

This Renogy battery disconnect switch gives you a single, obvious point to fully isolate your battery bank from the rest of the system — for maintenance, storage, or simply cutting power before you work on any wiring. It’s one of the more overlooked safety components in a DIY system, mostly because it doesn’t do anything until the one moment you actually need it.
Every system with a battery bank should have an easy way to disconnect it completely, rather than relying on pulling individual fuses or breakers one at a time.
A disconnect switch is just one part of a safe setup — see our DIY solar safety checklist for the rest.
Installing a Renogy battery disconnect switch is one of the simplest additions you can make to protect against parasitic drain when a system sits unused, and it also gives you a single, obvious point to cut power before doing any wiring work. It’s inexpensive compared to the rest of a battery bank setup, but skipping it is one of those shortcuts that tends to cause problems later.
It is a small, worthwhile addition to any DIY battery bank setup. Overall, this Renogy battery disconnect switch is a small investment that adds real peace of mind to any DIY battery bank setup.
Mount it somewhere accessible near the battery bank, not buried behind other gear, so you can reach it quickly in an emergency or before servicing anything downstream.

This Renogy bus bar gives you a single, organized point to consolidate multiple positive or negative connections instead of stacking wires directly on a battery terminal or running a tangle of individual connections. Once a system grows past a couple of components, a bus bar makes wiring dramatically easier to follow, troubleshoot, and expand later.
This kit includes both a positive and negative bar, rated for up to 100A continuous (300A surge), which covers the vast majority of DIY solar setups without needing anything larger.
Bus bars are a key piece of a properly grounded system — our RV solar grounding guide covers the full setup.
A Renogy bus bar consolidates multiple wire connections into a single, secure point rather than daisy-chaining several ring terminals onto one battery post, which is both a fire risk and hard to keep organized. It comes with clearly labeled positive and negative terminals, making it easier to keep your wiring layout clean.
This Renogy bus bar is a simple way to keep a growing battery bank’s wiring organized and traceable. Overall, this Renogy bus bar is a simple way to keep a growing battery bank’s wiring organized and easier to troubleshoot later.
Look for a model with clearly marked, adequately sized studs for the gauge of wire you're running, and torque each connection to spec rather than just snugging it down by feel. A loose bus bar connection is a common source of intermittent power issues and unnecessary heat buildup in an otherwise solid system.
An inline fuse holder installed between your solar panel and the rest of your system protects against a short circuit in the panel wiring turning into a fire risk. It's a small, inexpensive component, but it's one of the easiest safety steps to skip when you're focused on the bigger-ticket items like panels and batteries.
MC4 connectors make it a drop-in addition to most panel wiring without needing to cut or splice anything — you're just adding a protected link in the chain between your panel and your combiner box or charge controller.
Not sure whether you need a fuse or a breaker here? Our fuses vs. breakers breakdown covers the difference.
This MC4 inline fuse holder installs directly into your panel connections, protecting the wiring between your panels and charge controller from overcurrent faults. It's a small, inexpensive component, but skipping fuse protection on panel wiring is one of the more common corners cut in DIY solar builds. Pairing it with the correctly sized fuse is a cheap way to protect a more expensive charge controller downstream.
This MC4 inline fuse holder is a small, easy addition that closes a real gap in panel wiring protection. Overall, this MC4 inline fuse holder is a cheap way to close a real gap in panel wiring protection that's easy to overlook.

A tilt mount lets you angle your panels toward the sun instead of leaving them flat against a roof, which can meaningfully improve output — especially in winter, when the sun sits lower in the sky and a flat-mounted panel is catching light at a steep, inefficient angle. It's a small hardware addition that can noticeably change how much power you're actually getting out of a fixed array.
This is worth the extra cost for permanent or semi-permanent installs where you can adjust the angle seasonally, though it adds complexity you don't need for panels you're planning to move or store flat, like most portable setups.
Dialing in the right angle matters more than most people think — see our guide on getting more power from your tilt angle.
A Renogy tilt mount kit lets you adjust panel angle seasonally, which matters more than most first-time installers expect. Since the sun's angle relative to your panels shifts significantly between summer and winter, being able to re-angle a flush-mounted panel a few times a year can meaningfully improve output during the seasons when you need it most.
This Renogy tilt mount kit is worth the modest cost for anyone chasing extra output from their panels. Overall, this Renogy tilt mount kit is worth the modest cost if you're chasing every bit of output your panels can produce.

Z-brackets are the standard hardware for flush-mounting a rigid panel to a flat or slightly curved roof — RVs, vans, sheds, and trailers all typically use this style of mount. They're simple, inexpensive, and about as foolproof as solar mounting hardware gets, which makes them a sensible default unless you have a specific reason to angle your panels instead.
If you're mounting a panel that didn't come bundled with mounting hardware, or you need extras for an expanding array, a standalone set of Z-brackets gets you there without paying kit prices for hardware you already know how to install.
If you're weighing mounting options for your panels, our roof vs. portable mounting guide can help you decide.
Renogy Z brackets are one of the simplest and most common ways to flush-mount a rigid solar panel to an RV roof or similar flat surface, using minimal hardware and a low profile that doesn't catch wind like a raised mount would. They're a practical default choice unless you specifically need adjustable tilt.
These Renogy Z brackets are a practical, low-cost default for flush-mounting rigid panels on flat surfaces. Overall, these Renogy Z brackets are a practical, low-cost default for flush-mounting rigid panels on most flat surfaces.

Once you're wiring more than two or three strings of panels together, a combiner box gives you a single, organized, weatherproof point to bring all those strings together before they head to your charge controller — instead of a tangle of individual connections exposed to the elements. This box handles up to five strings, with built-in fusing for each one.
It's the kind of component that matters more as your system grows: a two-panel setup doesn't need one, but once you're running four, five, or six strings, a combiner box is what keeps the wiring organized, protected, and serviceable instead of becoming a mess you don't want to open up.
Combining multiple strings means longer wire runs to think about — see our guide on calculating voltage drop before you finalize your layout.
Running five separate wire pairs from your panels all the way to your charge controller gets messy fast, and this Renogy solar combiner box solves that by consolidating those strings into a single output pair close to the panels. That means less wire run overall and a cleaner installation on larger arrays.
This Renogy solar combiner box is worth adding to any array running multiple panel strings to one controller. Overall, this Renogy solar combiner box is worth adding to any array running multiple panel strings back to one charge controller.

Every wire that crosses from your panels on the roof to the rest of your system inside has to pass through the roof itself at some point, and that penetration is one of the most common places a DIY solar install develops a leak. A cable entry gland plate gives you a single, properly sealed point for that wire to pass through, instead of relying on caulk alone around a hole you drilled yourself.
This is one of those components that's easy to skip and only becomes a problem months later when water finds its way in. If you're mounting panels on a roof, this is a small cost against a real risk.
Proper roof penetrations are also a grounding and code issue — see our solar grounding guide for what inspectors look for.
Running wiring through a roof always creates a potential leak point, and a proper Renogy cable gland plate is built specifically to seal that penetration against water intrusion better than improvised solutions like silicone alone. It's a small, inexpensive part, but it's also one of the more common places a DIY solar install develops a leak if it's skipped.
This Renogy cable gland plate is cheap insurance against a common leak point in roof-mounted installs. Overall, this Renogy cable gland plate is cheap insurance against one of the more common leak points in a DIY roof-mounted install.